Schedule a demo of LiquidPlanner with a product expert today

Tracking time is a critical part of project management. It provides you with valuable data about the amount of effort required to complete your work, which in turn allows you to estimate future work more accurately. Time tracking data can also be used to feed your payroll and client billing systems.
Track Time from the Edit Panel
In the People section of the Edit Panel, simply click the Track Time link or click into the ‘Logged’ field to open the time entry box:
- You can track time in any of the following units: minutes, hours, days or even weeks (e.g. 480m, 8h, 1d, .2w). The time entry will be converted to your default workspace unit as necessary and will be transferred to your timesheet automatically.
- Select an Activity to categorize your time entry. The activity field may be pre-populated with the task default activity or your personal default activity.
- Enter multiple time entries to a task on a given date by clicking the ‘+ Add Time’ link below Activity. You’ll get a new row that will allow you to track additional time to the same activity, or choose a different activity for the new time entry.
- Enter a time entry note in the optional timesheet note box. This box can be resized by dragging the bottom border down to expand the window.
- Notations added in the timesheet note box will be captured in timesheet data exports. If the export will be used to create client invoices, we recommend reviewing the timesheet_entry_note column in the export prior to running invoices.
- After you refresh, you’ll see that your remaining effort estimate is automatically reduced by the number of logged hours. Even so, you should always review the adjusted remaining effort in case the scope of your remaining work has changed since the task was originally estimated.
- Click the link Show Estimate History at the bottom of the People section to see the time tracking and estimation history for that item.
If you clear or change a time entry after it has been saved, the remaining estimate will not change. LiquidPlanner does not make assumptions about the task’s current remaining effort, so be sure to update the estimate!
Track Time from the Timesheets Tab
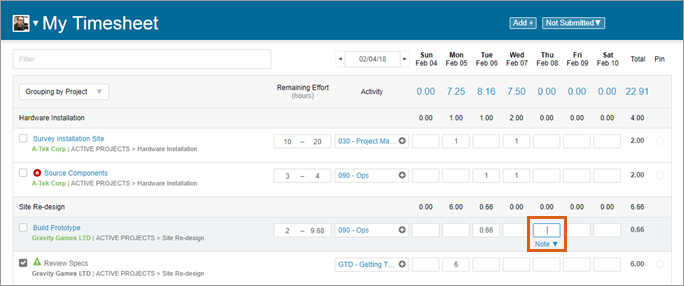
On the Timesheets tab, locate the task and click into the window for the appropriate day to log your time.
Entering your time
- From the timesheet, you can track time in any of the following units: minutes, hours, or days, as well as in the hh:mm format (e.g. 4:30)
- The timesheet will display logged time in hours.
- Time entry notations can be typed into the Timesheet note box. These notations will be captured in timesheet exports.
- You have the option to enter multiple time entries to a task on a given date. Just click the ‘+’ icon to the right of the Activity box, and you’ll see a window that will allow you to select the new activity. This will add a new row that will allow you to add additional time to this task.

Locating tasks on your timesheet
- You can use the Quick Filter field on your timesheet to locate timesheet items by name. Terms that you enter in this field will bring up any matching results from the task name, client, package, project or sub-folder name.
- To apply time to a past date that is not on the current timesheet, click on the date and use the arrow buttons to change between weeks.
- If you don’t see the task you need on the timesheet, click the “Add” button and select “Find Existing Item” to locate and add the task to your timesheet. Track time to it immediately, or use a pin to keep it on your timesheet.
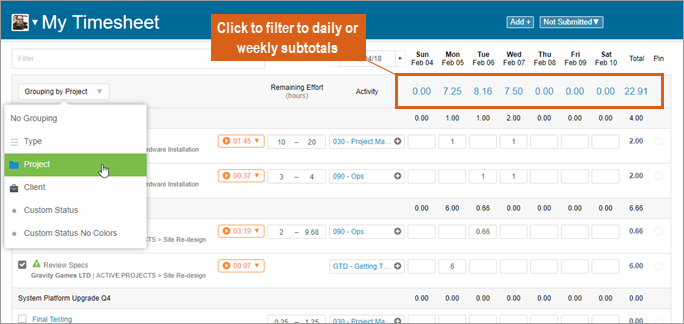
- You can also group tasks on your timesheet by project, client, and custom task field. The blue figures below each date represent the subtotal of your time logged for that date, while the figure under Week Total represents a subtotal of all time logged for the week. Clicking on either the daily or weekly subtotal will filter your timesheet to only tasks to which time was logged.
- Groups can be collapsed by clicking the arrow next to the group header.