 Schedule a demo of LiquidPlanner with a product expert today

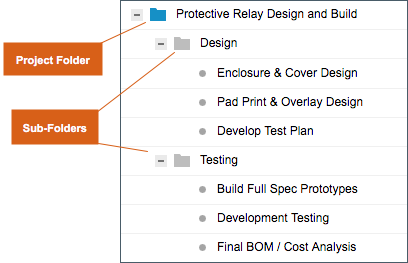
A project is represented in LiquidPlanner as a blue folder. Sub-folders (gray folders) can be used to structure your projects by phases or stages.
Create a Project or Sub-Folder
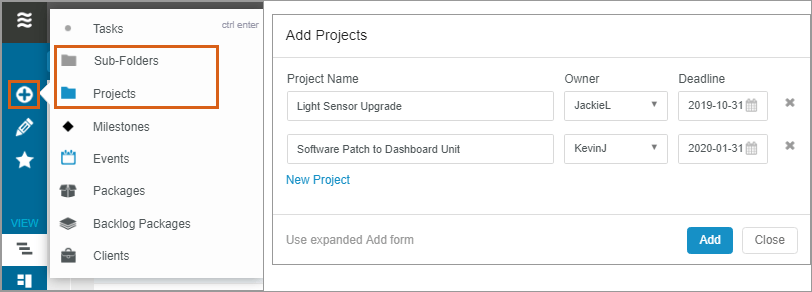
To create a new Project or sub-folder, go to the Projects tab > click on the Add Menu > select the item you want to add. You can add up to 50 items at one time.
Projects
Projects can live at the root of the workspace or within a package. A project will not nest within another project.
Add a Project to the root of the workspace
- Select the root of the workspace (workspace name), or any closed Package.
- Open the Add Menu, or right click.
- Enter project details in the add window dialog.
Add a Project to a Package
- Select and expand the destination package.
- Open the Add Menu, or right click.
- Enter project details in the add window dialog.
Unique Project Attributes
Projects have specific attributes that are not available for other plan items:
- Project Teams: Add members who will collaborate on the project. View the Project Team from the People section of the edit panel.
- Project Dashboard: The Project Dashboard link is visible to Project Team members from the Planning section of the edit panel.
- Activities: Share specific Activities for time tracking to a project, set up from the Activities section of the project edit panel.
- Access Controls: Establish project access or Portal Access from the gear icon in the upper right corner of the project edit panel.
- Clients: Associate a project to a client via the project’s edit panel. Use Analytics to create Client reports.
Sub-folders
Sub-Folders can be created within a project or within another gray sub-folder; they can’t live at the root of your workspace, or independently within a package. When nesting sub-folders, select and drag a folder, then drop it on top of the intended parent folder.
Tips
- Rename a project folder or sub-folder by clicking on it’s title at the top of the edit panel.
- Prioritize entire projects by dragging and dropping the blue project folder into the desired priority position (relative to other projects).
- Tasks added to a project or sub-folder are scheduled in the order they are listed.
- Associate a project to a Client via the project’s edit panel. (Double-click on the project to open the edit panel. Enter Client View to see projects grouped by client.
- Enable a Portal for the project, or include it in a Dashboard, to share information with people outside your workspace.
- Activities enabled on projects designate hours spent as billable or non-billable.
- Use Timesheet Export to track and analyze time spent on tasks within the project.
- LiquidPlanner’s predefined reports and Analytics make it possible to analyze projects across various dimensions.