 Schedule a demo of LiquidPlanner with a product expert today

LiquidPlanner provides the flexibility to schedule Full-Day and Partial-Day Events that precisely accommodate your plans — a half day team meeting, two hour client meeting, company-wide holidays, or personal vacation.
Creating events is important – they ensure that no project work will be scheduled for anyone assigned to the event during that day or time.
- Full-Day Events are typically used for PTO or holidays, because they block out a full day of availability.
- Partial-Day Events are great for scheduling meetings and appointments that start and end at specific times.
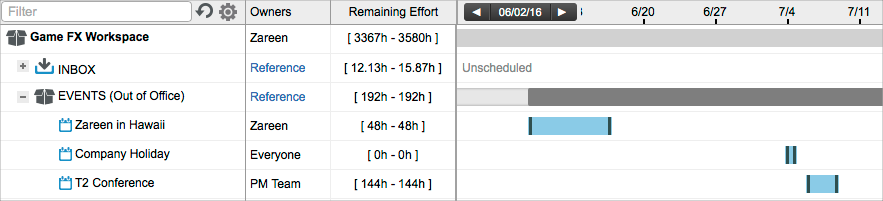
The EVENTS (Out of Office) package is one of the default packages in every new workspace. We recommend using this package to hold and organize events in the workspace for easier filtering and reporting. Events always schedule (block out availability) for the date and time selected within the event edit panel regardless of where they have been prioritized in the plan.
Create an Event
Step One: Add a Full-Day or Partial-Day Event
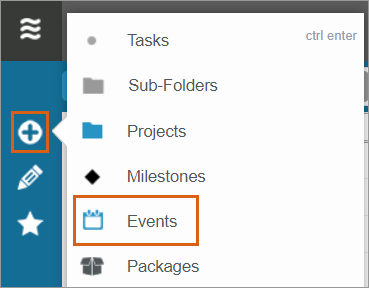
- Go to the Projects tab.
- Click on the Add Menu.
- Select Events.
- To create a Partial-Day Event, simply enter Event Name, Owner, Date and Start Time and End Time in the form and click Add.
When adding a Full-Day Event, select the Full-Day Event checkbox first, then enter Event Name, Owner, Start Date and End Date and click Add.
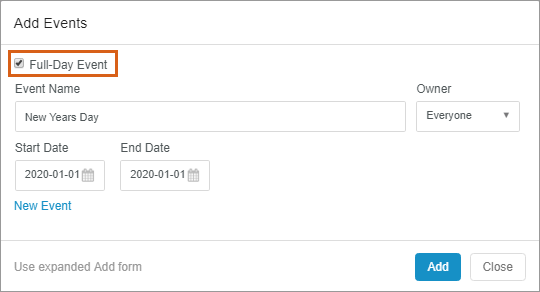
- To add another event, click New Event link.
Step Two: Add or Remove People
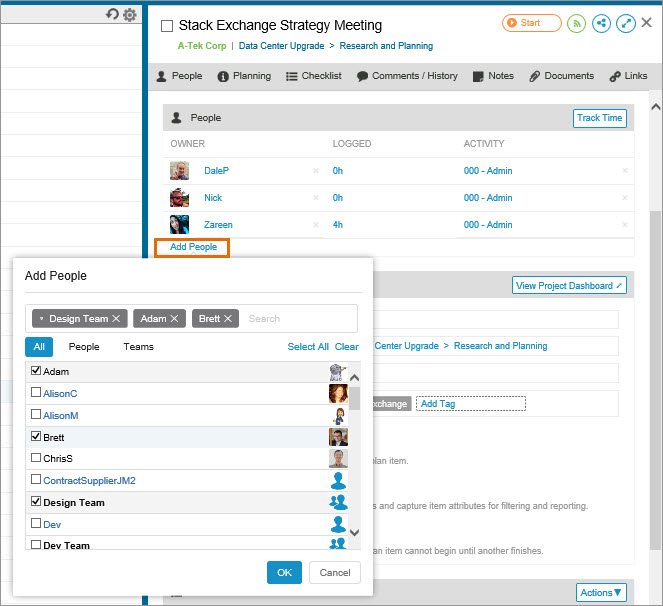
- Go to the Edit Panel.
- Click on Add People.
- Check boxes to add add People or Teams and click OK.
- Remove participants by clicking on the ‘x’ next to their name in the Owner column.
Set a Partial-Day Event to Recur
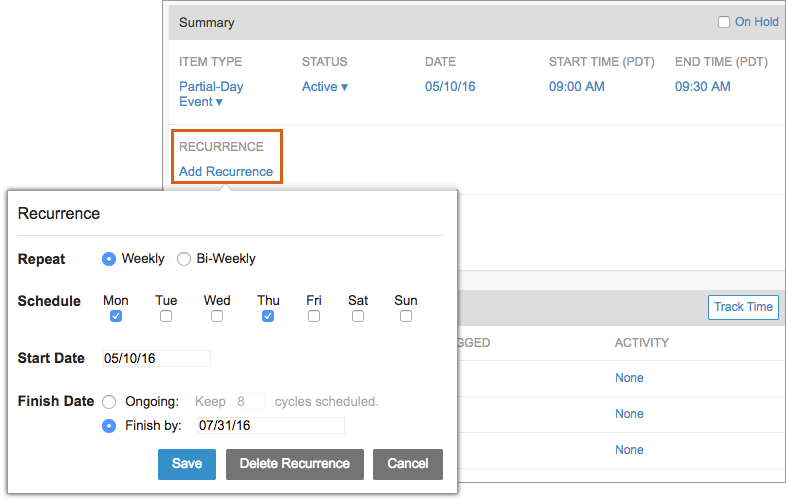
Meetings or other partial-day events that happen on a regular basis can be set to recur. To add a recurrence to a partial-day event, click Add Recurrence in the event’s edit panel. Here are the options in the Recurrence window:
- Repeat: Set your event to recur weekly or bi-weekly (every other week)
- Schedule: Set the day(s) when your event should recur
- Start Date: The start date will default to the date on which you’re adding the recurrence, and events will start to recur on or after this date. To change the start date, click the date field and select a date on the calendar.
- Finish Date: “Ongoing” allows you to set the number of cycles (up to 26) that should be kept on the schedule at one time. “Finish by” allows you to set the date by which you would like the recurrences to end. Events cannot be set to recur beyond one calendar year when using the “Finish by” option.
Consider an example: A new project is being launched on August 24th and several of teams will meet twice a week to discuss its status. The event needs to be set to recur weekly on Mondays and Thursdays starting on May 10, 2016. Since the project has a deadline of July 31st, the event also needs to be set to finish by that date.
If the hours logged to these meetings need to roll up to the project, this event should be kept in the project folder, otherwise it can stay in the Events package.
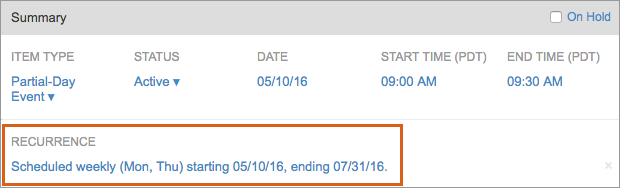
Once the recurrence has been set, the schedule will appear in the Summary section at the top of the edit panel:
To remove the recurrence, click on the recurrence schedule and select Delete Recurrence and then Confirm.
Best Practices for Events
- For public holidays and other instances requiring you to block off a full day of availability for all workspace members, assign a Full-Day Event to “Everyone”.
- Ask participants to track time for events when Analytics and other reports are needed to track the time allocated toward events.
- Mark Full-Day and Partial-Day Events Done after the Event date has passed.
- Mark a Recurring Partial-Day Event Done only after all recurrences are complete.
Notes
- LiquidPlanner will show an overbooking alert
 when conflicting events are scheduled, except when an event overlaps with a Full-Day Event assigned to “Everyone.”
 - Remaining Effort is not calculated on Full-Day Events assigned to “Everyone,” however, the event will block out availability for each person in the workspace.
- Remaining Effort is calculated on Partial-Day Events based on each resource’s availability i.e., by multiplying the duration of the event by the number of owners.
- When Events are scheduled for participants in multiple timezones, each participant will see the event start and end displayed in their own time zone on the edit panel and on the schedule.
- Events can also be created using the Right-Click Menu as well as with the Add button on the Timesheets tab. When created from Timesheets, events land in the Inbox by default.
Related Articles
Availability
Your Personal Profile Settings
Alerts
Restricted Members