 Schedule a demo of LiquidPlanner with a product expert today

Exporting timesheet data puts all of the time entries within the parameters you set into a CSV, XML or Quickbooks-compatible file. This is useful for accounting and reporting purposes.
Run the Export
Workspace administrators and managers can export timesheet data as follows:
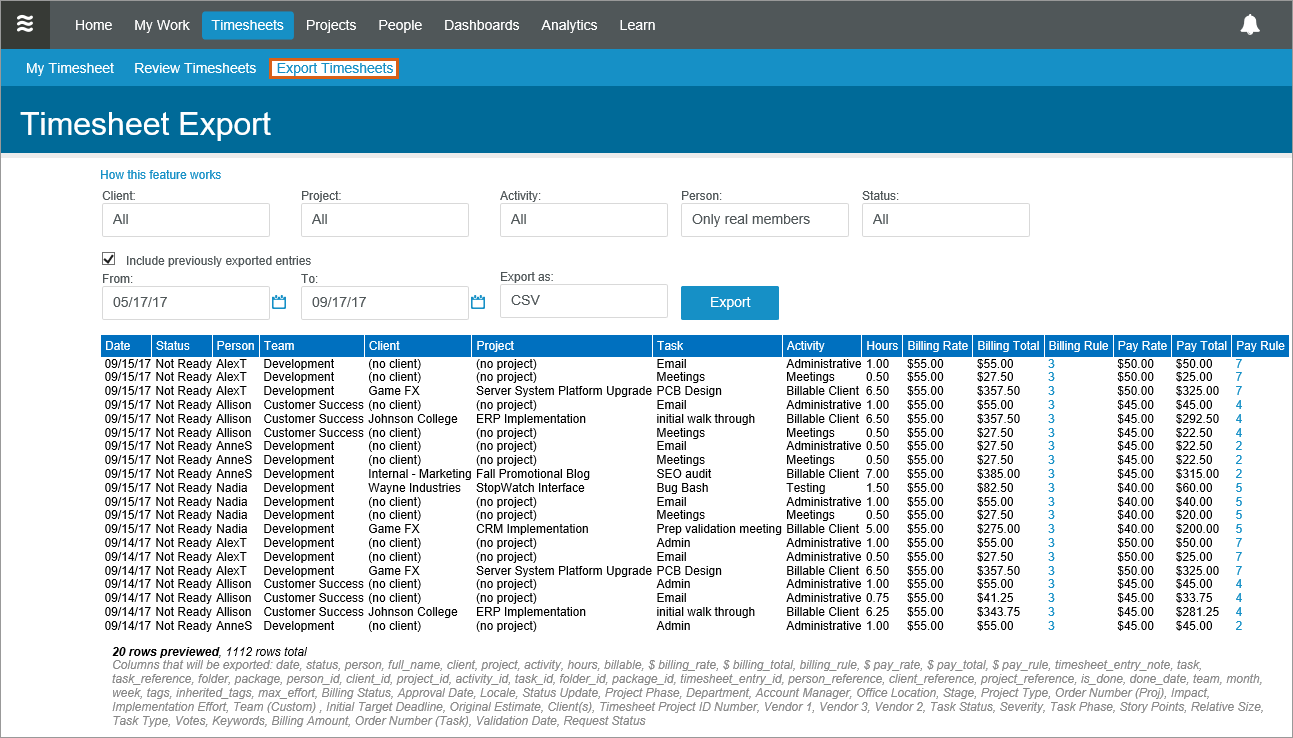
- Go to the Timesheets tab > Export Timesheets
- Use the filter tools (see filtering section below) at the top to identify the timesheet entries you want to export. If you are using timesheets for invoicing, we recommend that you export only locked timesheets and develop an internal protocol for coordinating your data transfers.
- Choose the preferred export format (XML, CSV, or Quickbooks) and click Export
- Quickbooks users please note: exporting timesheet data to Quickbooks requires that you complete a one-time configuration in advance.
- Your results will include only time entries that are new since the last time you exported. If you want to capture time entries that had been exported previously, be sure to check the box that says “include previously exported entries.”
Filter Data for Export
Click into the fields at the top to open the filter dialogs and select just the information you want exported. Within the filter dialog, click on Options to further filter your selections:
Helpful Tips
- The preview shown on the Timesheets tab shows you just 20 of the rows that will be exported to give you an idea of what you’ll see in the file.
- Columns that will be exported: date, status, person, full_name, client, project, activity, hours, billable, billing_rate, billing_total, billing_rule, pay_rate, pay_total, pay_rule, timesheet_entry_note, task, task_reference, folder, package, person_id, client_id, project_id, activity_id, task_id, folder_id, package_id, timesheet_entry_id, person_reference, client_reference, project_reference, is_done, done_date, team, month, week, tags, max_effort, and your custom columns.
- To connect timesheet data with your accounting system, it can be helpful to use the Reference field to record related information. The Reference field is captured in timesheet exports, and the field is available on member profiles, clients, projects, and tasks:
- person_reference – In the People tab, this is the External ID box on the member profile. Enter the ID your accounting system uses for that person.
- client_reference – In Client View, find it in the Planning section of the client’s Edit Panel
- project_reference – In the Projects tab, find it in the Planning section of the project’s Edit Panel
- task_reference – In the Projects tab or Home > My Tasks, find it in the Planning section of the task’s Edit Panel
- Time entry notations typed into the private yellow Timesheet note box will be captured in timesheet exports. If the export will be used to create client invoices, we recommend reviewing the timesheet_entry_note column in the export prior to running invoices. In Quickbooks, the private Timesheet note is included in the same field as the task name.
- Upon previewing or running the export, members with Manager access will not see any values derived from billing and pay rules. Only workspace administrators can see rate sheet (bill and pay) data.