 Schedule a demo of LiquidPlanner with a product expert today

Rate sheets provide LiquidPlanner with the data necessary to calculate dollar values for your logged and remaining hours. Workspace administrators can create and edit rate sheets by clicking the User Menu > Settings > Data Customization > Billing Rules or Pay Rules.
Billing and Pay Rules
LiquidPlanner has two different rate sheets:
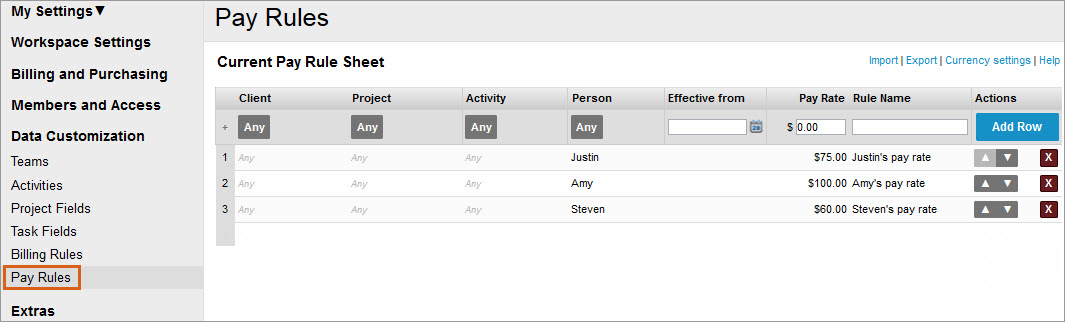
On the Pay Rules sheet you load pay rates for your workspace members (by person or team):
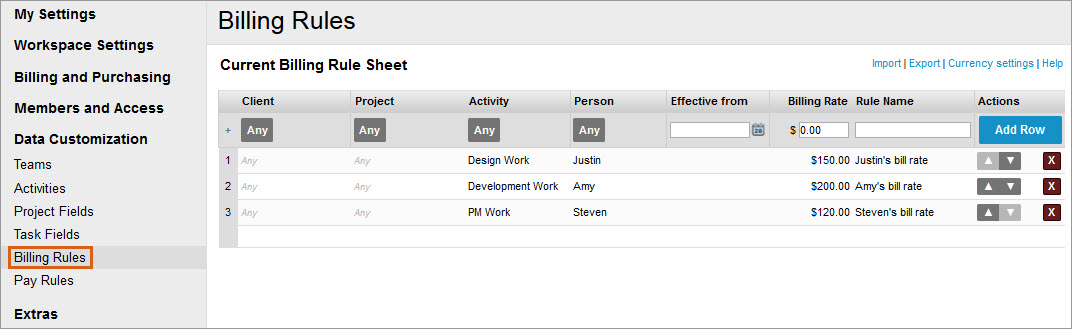
 On the Billing Rules sheet, you load billing rates:
Viewing Rate Sheet Output
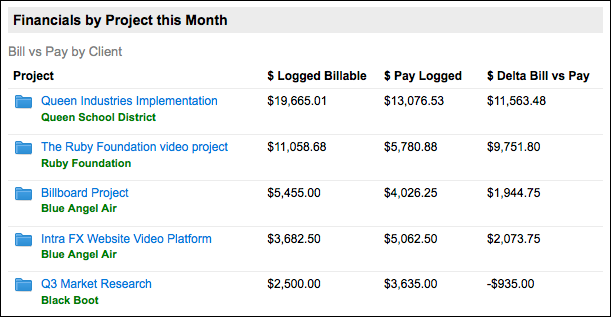
Rate sheet data is used to calculate valuable financial metrics in your Analytics reports, timesheet exports and dashboards. Rate sheets are important for project costing and identifying budget risks in your projects.
Analytics and Timesheet Export
Here are rate sheet calculations in a project report that was generated via the Analytics Tab:

Here are rate sheet calculations in a timesheet export:

Dashboards
Rate sheet data can be exposed in the Analytics Table widget.
Only workspace administrators can:
- Surface rate sheet columns when creating the Analytics Table widget.
- Edit an Analytics Table widget that has rate sheet columns exposed.
- Change the common filter if there is financial information anywhere on the dashboard.
- Duplicate the dashboard if there is financial information anywhere on the dashboard.
Dashboard Editors cannot complete any of the above actions unless they are also an administrator in the workspace. This ensures that administrators can control the audience that sees financial data.
Creating a Rate Sheet
A rate sheet consists of a series of rate rules, one per row. Each rule specifies the rate that should be applied when certain conditions are met for hours logged or hours remaining. The conditions can be any combination of Client, Project, Activity or Person.
The order of rules matters! For example, for a given time entry, LiquidPlanner runs down the rate sheet rules from top to bottom until it finds the first rule that matches the time entry conditions. It applies the rate for the first rule match only, even if there might be another rule match further down the list.
To create a new rule:
- Set the conditions (Client, Project, Activity, or Person), Effective from, Rate, and Rule Name in the top data entry row.
- Click the Add Row button to create that rule.
- Use the up and down arrows next to the rule to arrange the order, if necessary.

Here are some things to keep in mind when adding new rules:
- When creating rate rules for a team, if there is a member on the team to which a different rate rule should apply, be sure to list that member’s rate rule above the team rate rule.
- If you have a significant number of rate rules, you may find it easier to create your rules in a spreadsheet and then import them all at once. See the instructions below for importing and exporting rate sheet data.
Editing or Deleting a Rate Sheet
Be thoughtful about editing or deleting existing rate rules! When you edit or delete a rule, the change is applied retroactively to all existing time entries.
To prevent inadvertent rate sheet edits, you can’t edit an existing rule directly via the user interface. You must export your rate sheet, make the edits in the spreadsheet and then import the rate sheet back in.
Importing and Exporting Rate Sheet Data
Creating new rules
If you have a significant number of rate rules, you may find it easier to create your rules in a spreadsheet and then import them all at once. Begin by creating a template to input your rates. Open a rate sheet (Billing Rules or Pay Rules) and click the Export link at the upper right corner. This will give you a .csv file to use as a template for creating rate rules.
Updating existing rules
Open a rate sheet (Billing Rules or Pay Rules) and click the Export link at the upper right corner to export existing rates. This will give you a .csv file to use as a template for editing existing rate rules. When changing rates, be sure to insert a new rule with an accurate effective date (do not reuse rule names).
Working with the .csv template
The “Important Notes” section of the .csv provides a few simple steps for creating rate rules using the template. The “Workspace Data” section provides the total list of options for each field, Client, Project, Activity, Member. Copy and paste the relevant plan information to specify rates by condition. Build out the spreadsheet and re-save in .csv format.
To import rates:
- Open either the Billing Rule or Pay Rule Sheet.
- Click the Import link at the upper right corner.
- Browse to select your .csv file.
- To confirm the import click Apply.

Related Articles
Project Costing
Analytics Roll-Up Reports
Exporting Time Tracking Data
Create Activities and Link to Tasks
Adding Members to Teams
Dashboards
Expenses