Schedule a demo of LiquidPlanner with a product expert today

You might generally know how much time you spend doing your work, but it’s easy for time to slip away from us. Use timers to keep track of the amount of time you spend working on a task.
Here are the important things to know about timers:
- Timers display accumulated time in the HH:MM format, starting at the one minute mark.
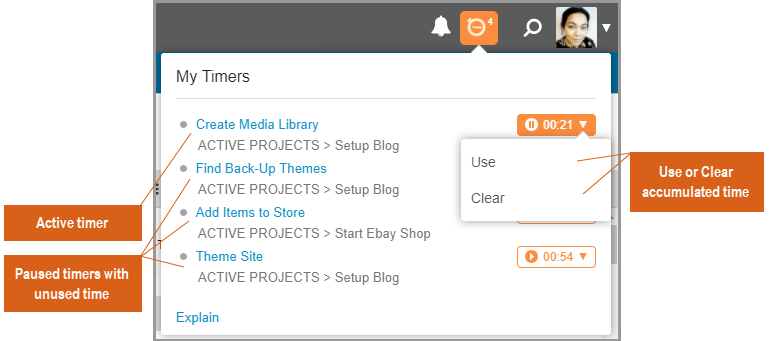
- When you start a timer, it will keep running until you click the timer icon to pause it, or until you start a timer on a different task. When a timer is paused, the accumulated time is held for you. You can restart the timer to pick up where you left off, or you can apply the accumulated time to your timesheet.
- Clicking Use will apply the accumulated time to your timesheet. Clicking Clear will clear the accumulated time for that task.
- Timers are associated with your own member login, which means they are not used to track time for other members or virtual members.
- The timer icon in the workspace header will tell you how many tasks currently have timers with time on them. You can click on the timer icon to see a list of the tasks with accumulated time.
- Only one timer can be active at a time.
Start and Stop a Timer
You can start and stop a timer anywhere you see the timer icon simply by clicking play or pause on the timer. There is a maximum limit of 100 active (running or paused) timers per person in the workspace.

Timers are located in the following places:
On the Projects tab
- If you expose the My Timers column.
- To the right of the task name in the Edit Panel.
- On the workspace header (if there is at least one task with an active timer or a paused timer with unused time).
On the My Work tab
- The timer icon appears when you hover over the task in the list.
- To the right of the task name in the Edit Panel when you click on a task in the list.
- On the workspace header (if there is at least one task with an active timer or a paused timer with unused time).
On the Timesheets tab
- Hover over an item row to see the timer button.
- To the right of the task name in the Edit Panel when you double-click on a task.
- On the workspace header (if there is at least one task with an active timer or a paused timer with unused time).
Apply Accumulated Time
When you are done with your work and ready to log the timer hours:
- Click the active timer to pause it.
- Click the small down arrow on the paused timer. You’ll be presented with a choice to Use or Clear the time. Select Use.
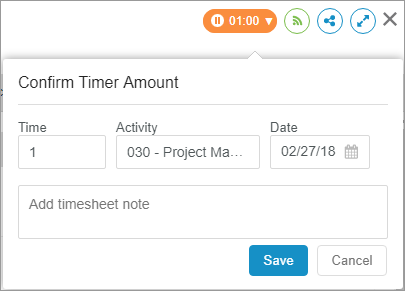
- A window will appear to confirm the timer amount. The total time, activity, or date of the entry can be adjusted and a note can be added.
- Clicking Save will log the time on the current date for the plan item with which the timer is associated.