 Say hello to the new Tempo! LiquidPlanner is now Portfolio Manager.
What is SSO?
Single Sign-On (SSO) is a session/user authentication process that permits a user to enter one name and password in order to access multiple applications. The process authenticates the user for all the applications they have been given rights to and eliminates further prompts when they switch applications during a particular session.
How does it work with LiquidPlanner?
LiquidPlanner supports SAML 2.0 (Security Assertion Markup Language), which allows for the use of Single Sign-On (SSO) using enterprise identity providers such as Active Directory and LDAP.
Enabling SSO via SAML 2.0 means that user authentication is handled entirely outside of LiquidPlanner.
For SP-initiated SSO
Main Flow:
Open your Custom Subdomain Link: https://app.liquidplanner.com/sso_login/[yourCustomSubdomain] found under User Menu > Settings > Single Sign On Configuration:
If your IT team has set up pass-through authentication in your Identity Provider (IdP), then after you authenticate with your IdP, the Custom Subdomain Link will redirect you into your workspace without asking you to enter any LiquidPlanner credentials. This flow is the easiest and most secure way to log in to LiquidPlanner.
Alternative Flow:
- Open LiquidPlanner login page: https://app.liquidplanner.com/login.
- Enter your email in the Business Email field.
- Click the Sign in button.
What do you need to use SSO with LiquidPlanner?
To use SSO to log in to LiquidPlanner, it’s imperative that you work closely with your IT team to ensure all of the following:
- Your SSO Identity Provider is SAML 2.0 based, set up and fully configured.
- You have a SSL certificate or fingerprint of that certificate. (Also known as the SHA1 fingerprint of the SAML certificate or the certificate file (.crt) from your SAML server.)
- You know your ‘SAML 2.0 URL’. Also known as the Remote Login URL for your SAML server/service and sometimes called SAML Single Sign-on URL.
- You have a LiquidPlanner workspace with the SSO feature enabled.
Note: If your organization uses Active Directory, please see Configuring SSO with ADFS. Contact support@liquidplanner.com if you need help at any point during the process.
Step 1 – Configure SSO
- A workspace administrator must log into LiquidPlanner and click their User Menu (profile picture) to access Settings.
- From the left-hand navigation select: Single Sign On Configuration.
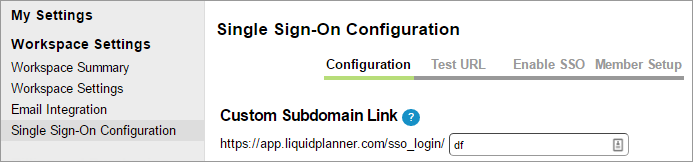
- Select Configuration.
- Choose a unique subdomain for custom login. E.g. your company name or an abbreviation.
- Upload your SAML Identity Provider Certificate: click Choose File, and then follow prompts to select and save the file. You can also simply copy and paste (or type) in your SHA1 fingerprint. If you do not know this, contact your IT administrator.

- Copy and paste (or type) in the Remote login URL that will authenticate your users.

- If your organization’s SAML integration provides a redirect URL for logout, copy and paste (or type) in the Logout landing URL; otherwise leave blank.

- Review your LiquidPlanner SAML Service Provider details.
- If you desire, configure a custom error message that will appear for users unable to authenticate.
- Click Save.
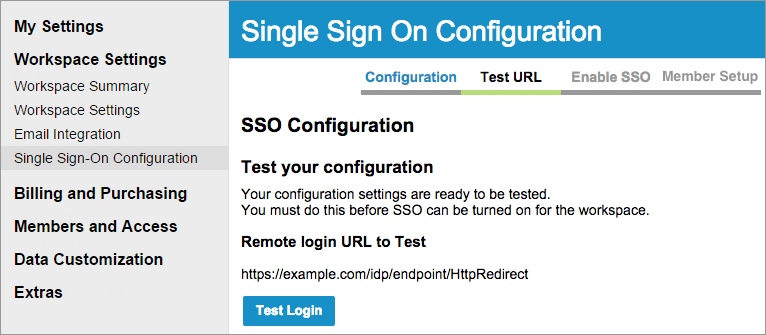
Step 2 – Test SSO
After you configure your SSO settings, you must test them. Select Test URL to do this.
Note: The login page you will be redirected to is from your SAML provider. If you do not know the credentials, please contact your IT administrator.
After each test, LiquidPlanner will automatically return you to the SAML SSO page with diagnostic results.
If you need to change any configuration settings, go back to the Configuration tab.
Step 3 – Enable SSO
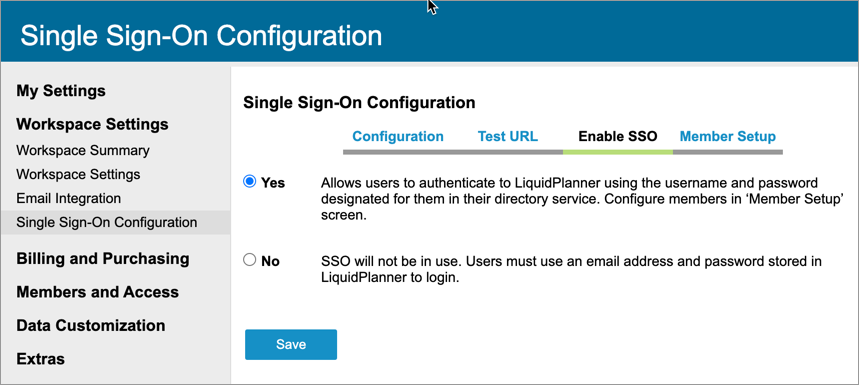
Once your test is successful you’re ready to enable SSO in your workspace. Select Yes, then save and move on to Member Setup.
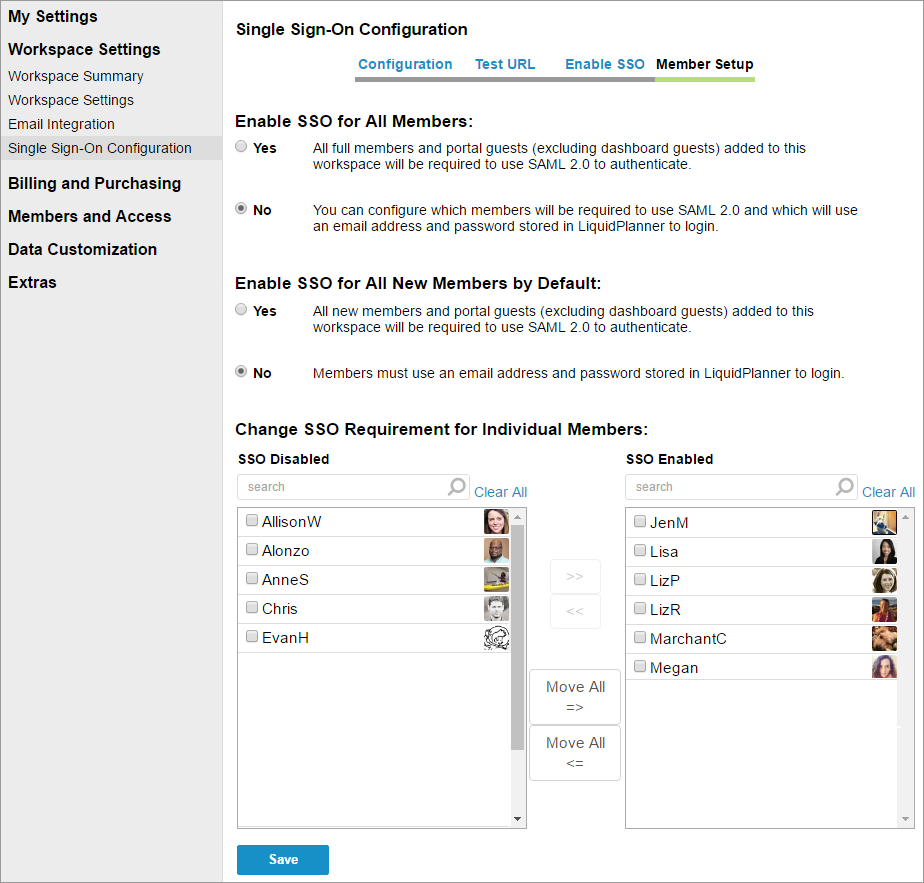
Step 4 – Member (User) Setup
Once the LiquidPlanner Team has enabled SSO in your workspace, you need to return to the SSO setup page in your workspace settings to configure your LiquidPlanner members’ behavior.
- Determine if you would like the all workspace members to be using SSO at the same moment by selecting Yes for Enable SSO for All Members.
IMPORTANT NOTE: We strongly recommend keeping SSO disabled for at least 1 workspace member, such as the workspace owner or another admin who has access to update SSO settings. If all members have SSO enabled, then you will not be able to access your workspace if your SSO configuration fails (for example, if your certificate expires or you switch SSO providers). - Determine if you would like all new workspace members automatically to be set up with SSO required by selecting Yes for Enable SSO for All New Members by Default.
- To move one member at a time, or a group of members, into SSO Enabled, select them from the SSO Disabled box and use the >> arrows to move them to SSO Enabled. Alternatively you can move everyone at once with the Move All => button.
- Once done with selections, click Save.
IMPORTANT NOTE: As soon as you click the Save button on this page, the workspace members who are listed under SSO Enabled will be prompted to authenticate via SSO at their next action with LiquidPlanner.
Related Articles