Card View presents your tasks and projects in a board display that is based on the Pick List Custom Project and Task Fields that you’ve set up in your workspace. Whether you work in an Agile or Kanban style, or simply want to see your projects and tasks in terms of your custom fields, Card View provides a visually-friendly view of your plan.
To use Card View, follow these steps:
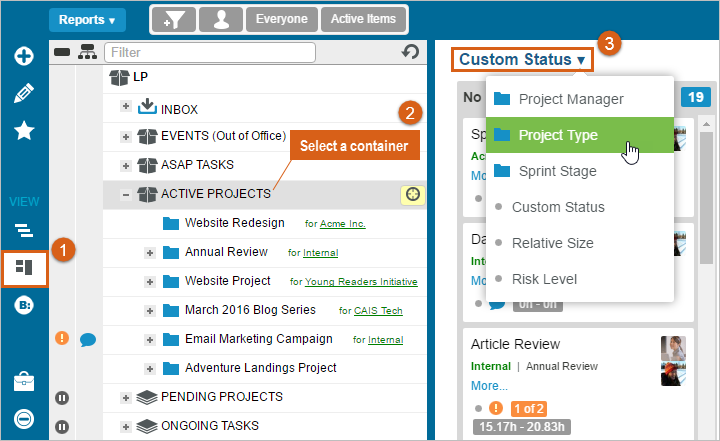
- Navigate to the Projects tab, click on Card View from the left side navigation bar.
- Select a container from your plan to display cards for items in that container. Use multi-select to view items from multiple containers at once.
- Change the category by clicking on the category drop-down menu and selecting one of the pick list custom project or task fields.

View Project and Task Cards
Your projects or tasks will appear in columns according to the selected custom field’s values. If there are items without a specific value in the custom field, they will appear in a separate column called “No [Custom Field]” on the left.
The number of items in each column appears in the column header. You can scroll both vertically and horizontally to display more cards.
Click More… to expose the owner name(s), brief description, and any other custom values. To fully expand all cards, hold the Shift key down as you click More….

Full filtering functionality is available in Card View. After applying your filters, remember to click on the root of your workspace (workspace name at the top of the project plan hierarchy) to bring all filtered items into view.
Change Custom Field Values
Card View is great for seeing the status of your work according to the different phases or other categories you’ve set up as custom fields in your workspace.
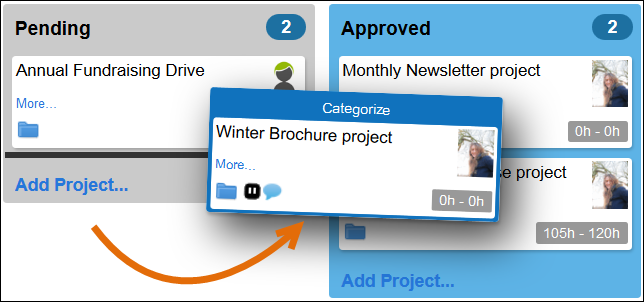
To move a card from one category to another, simply drag and drop it into the relevant column. Use the Ctrl key on your keyboard to multi-select and drag multiple cards to a different column. Re-categorizing a card will change that item’s custom field value, but moving the card horizontally will not change the priority position. It will maintain the same priority placement in Timeline view.

Prioritize in Card View
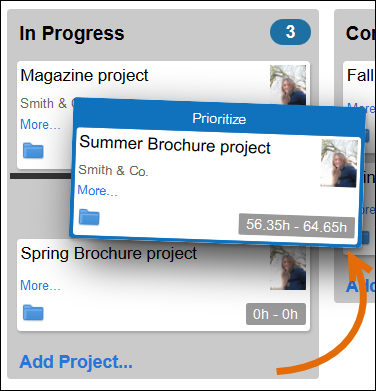
Items in each column will appear in the priority order that has been defined in the project plan (Timeline view).
You can reprioritize tasks and projects that reside in the same container by moving cards up or down within the same column.

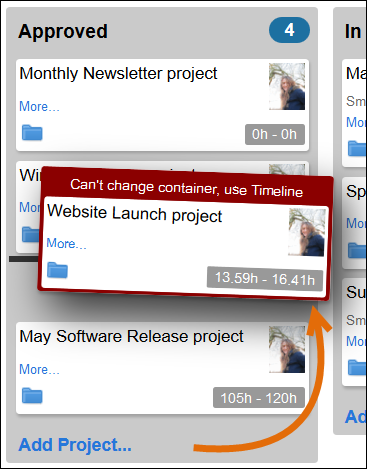
If moving a card changes the item’s container, a red alert will appear on the card prompting you to drag the card to a container in the Navigator Panel, or use Timeline view instead.

For more complex prioritization, a best practice is to use the Timeline view or change the item’s project or package association in the Edit Panel.
Workspace members who have been restricted from reprioritizing will be prevented from reprioritizing in Card View.
Add Items In Card View
Click “Add” at the bottom of a column to add a new task or project in Card View. The new item will be added to the container that is currently selected in the Navigator panel, and it will inherit the custom field value for the column to which it was added.
 Say hello to the new Tempo! LiquidPlanner is now Portfolio Manager.
