 Say hello to the new Tempo! LiquidPlanner is now Portfolio Manager.
It’s possible to use LiquidPlanner to track bugs, either in addition to your current bug tracking software (via the API or Webhooks), or on its own. LiquidPlanner can be used exclusively for filing, tracking, verifying, and collaborating to resolve bugs – all without any outside integration.
Using LiquidPlanner to track bugs allows you to manage these items within the schedule, alongside other projects and tasks. Bugs can be assigned, estimated, and prioritized in relation to project work, based on their severity and impact. Bug reports can be submitted by creating a task from within the workspace, via Email Integration, or via Dashboards.
Submitting Bug Reports via Email
If workspace members add the Inbox email address to their contact list, anything that needs attention can be quickly and easily sent into LiquidPlanner.
When using email integration to submit bugs, the subject of the email becomes the task name. The body of the email (including screenshots, repro steps, or error messaging) appears on the Notes section of the task’s Edit Panel. Any documents attached to the email are automatically uploaded to the Documents section, ensuring that all relevant information stays with the task as it goes through the workflow.
To identify tasks that are bugs, we recommend using “Bug:” at the beginning of the task name (or email subject line). Once in the inbox, bugs are readily identified.
Submitting Bug Reports via Dashboards
Bug Reports can also be submitted into the workspace via an intake form widget on a Dashboard. To set this up, first configure the widget, designating where in the workspace the bug task will be added and which fields are hidden, optional, or required when the bug report is submitted. In the example below, the new task will be added to the Inbox, the Notes and custom fields “Bug severity” and “Bug type” have been made required fields, and attachments are allowed so they will be automatically uploaded to the Documents section of the task.
A widget configured as shown above will create the following intake form on a Dashboard:
Workspace members and dashboard guests can easily submit a new bug into the workspace by clicking on the widget and filling out the configured Bug Submission form that opens.
Managing the Inbox
After bugs are reported, they need to be evaluated and prioritized. As a best practice, have one or two team members follow the inbox to ensure that anything urgent is addressed immediately. It may also make sense for team members to meet regularly and review new items as a group – estimating, assigning, and prioritizing them on the spot. Depending on their severity, some might move into the current sprint while others get pushed to a staging sprint or even your backlog.
Bug Bashing
Assigning a bug to a developer generates an email notification, so they know right away when new work is assigned. With the priority established and all information provided on the task, the developer can jump into the My Tasks view on the Home tab and work through their tasks- one right after the other.
Viewing and Reporting
On the Projects tab, structure your sprint package so it’s easy to identify bugs included in the current sprint. Keeping them separate from other tasks like new features or tech debt makes it easier to view, analyze, and report on bugs as a group.
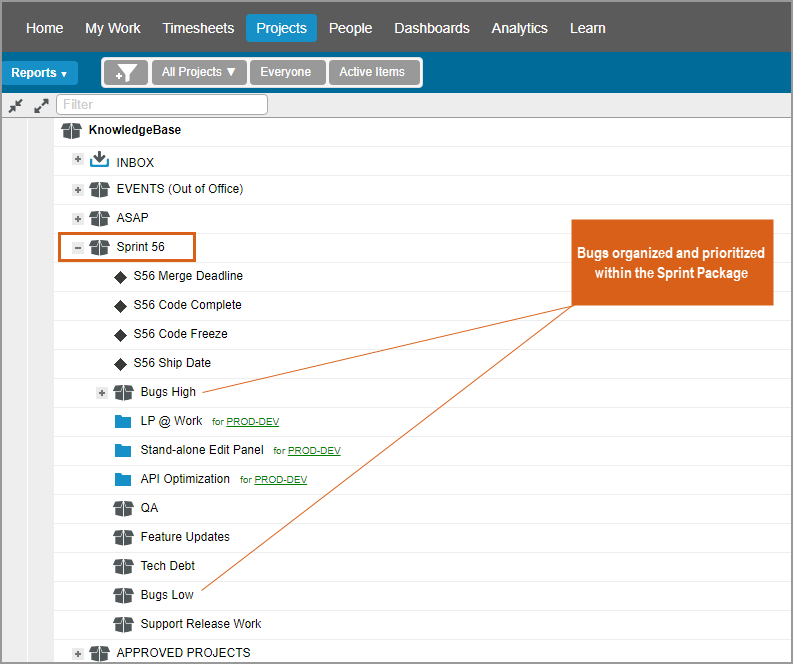
Establish custom project or task fields and tags to categorize bugs as well as convey information about their status. Use these features to build reports that measure and evaluate the impact bugs have on your product, the schedule, and workload. Filter the projects tab to see bugs more easily. Save the view as a favorite so you can refer to it quickly. Set up Dashboards to monitor the progress of these items.
Collaboration and Communication
Because all comments, collaboration and activity are recorded on the task, it’s easy to follow the bug’s life cycle from the initial report to repro, through development and resolution. When LiquidPlanner is integrated with your source control system, code check-in notifications can be automatically added as comments on the bug’s task as well.
These tips will help keep the information organized on the task:
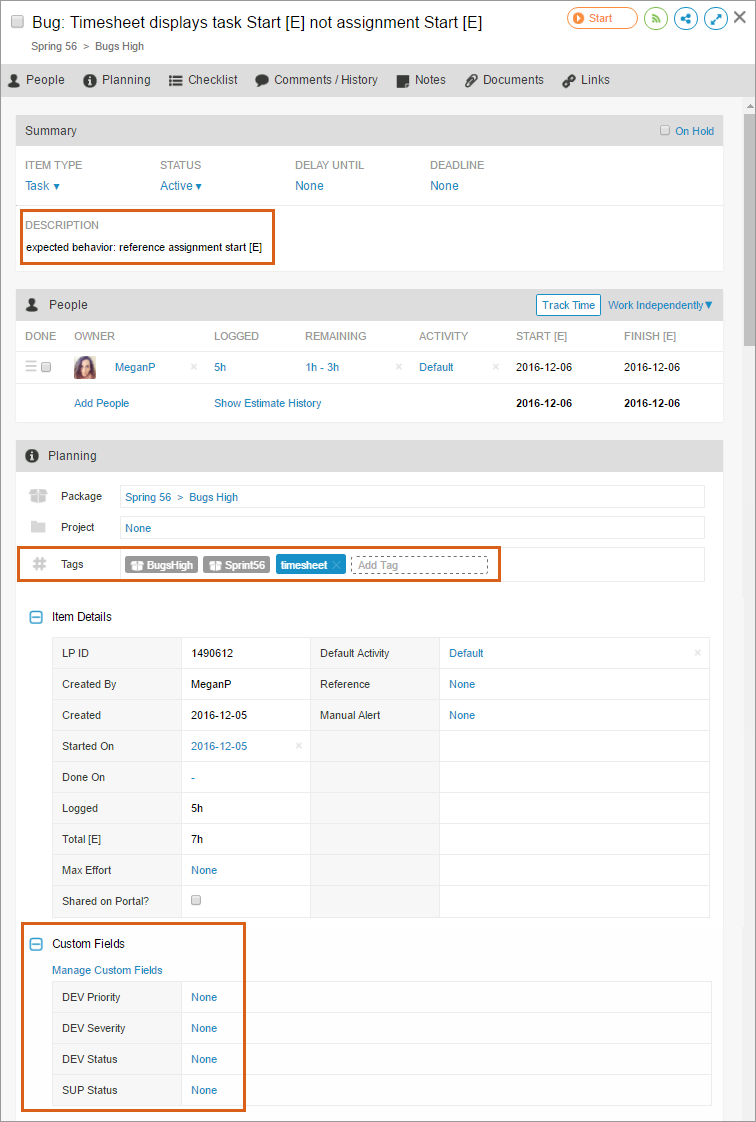
- Use the description field to provide a concise summary of the issue.
- Use the notes section to outline the repro steps and provide background information.
- Upload images and documents to the task. These can be sorted by upload date.
- Record additional reports of the same bug in the comments section.
- Update custom fields and tags as necessary throughout the process.
Verify and close out the task
After the bug is fixed by a developer, it’s ready to be verified. As a best practice, we recommend establishing a verification process to ensure that everything is resolved as expected prior to release.
All you need are some simple steps:
- Create a custom task field to convey bug status with values: in progress, verify, complete.
- Set task status to in progress when the task is assigned to a developer.
- When the developer’s assignment is completed and marked done, change task status to verify.
- Assign the task to someone in QA, or another workspace member who will verify the bug is resolved. As a new owner on the task, the tester will be notified that work was assigned.
- Once the fix has been tested and verified, change status to complete.
- Mark the task done.
Related Articles
Developer Resources
Email Integration
Edit Panel
Custom Project and Task Fields
Tags
Scrum With LiquidPlanner