Latest Feature | March 27, 2024
We are happy to announce the release of our latest feature: the People List Widget. As in the People Table Report, the People List Widget allows you to view and compare user availability and workload metrics, such as hours scheduled and time logged.
The People List Widget has the same columns and parameters as the People Table Report and you can customize the data you want to show to tailor your unique dashboard view. You can also apply a Date Range Filter to show hours logged or scheduled by all user types–Members, Resources, or Placeholders– in a given period. Each row in a People List Widget shows a roll-up of hours and work metrics for each user based on the widget scope.
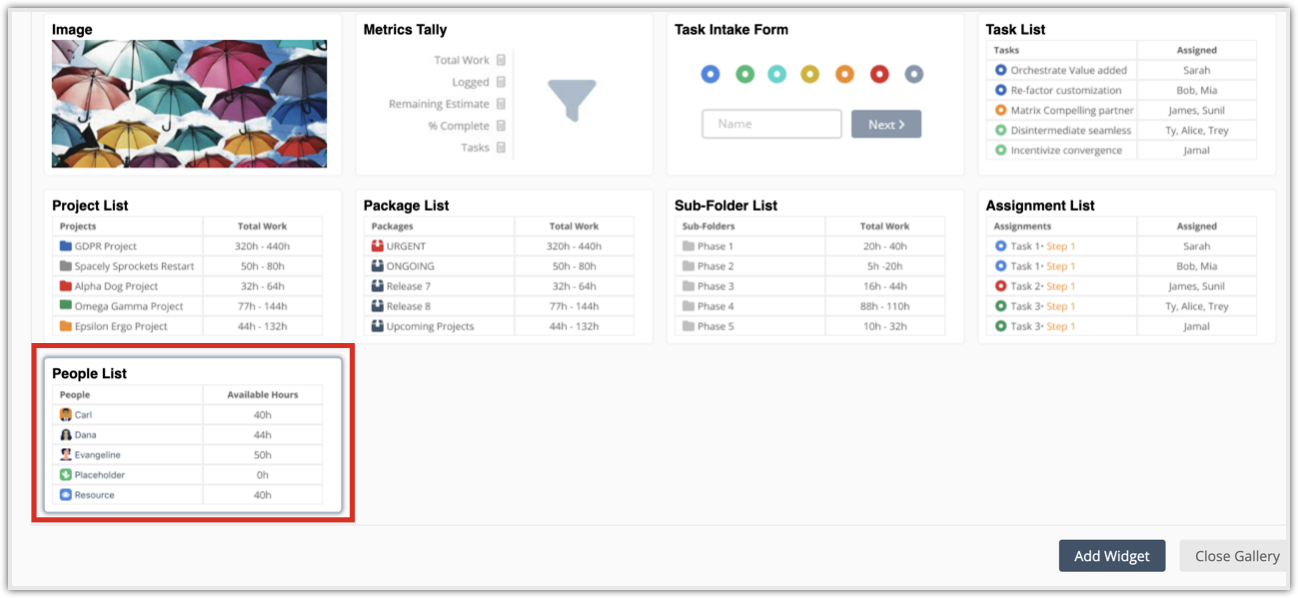
People List Widget in the Widget Gallery
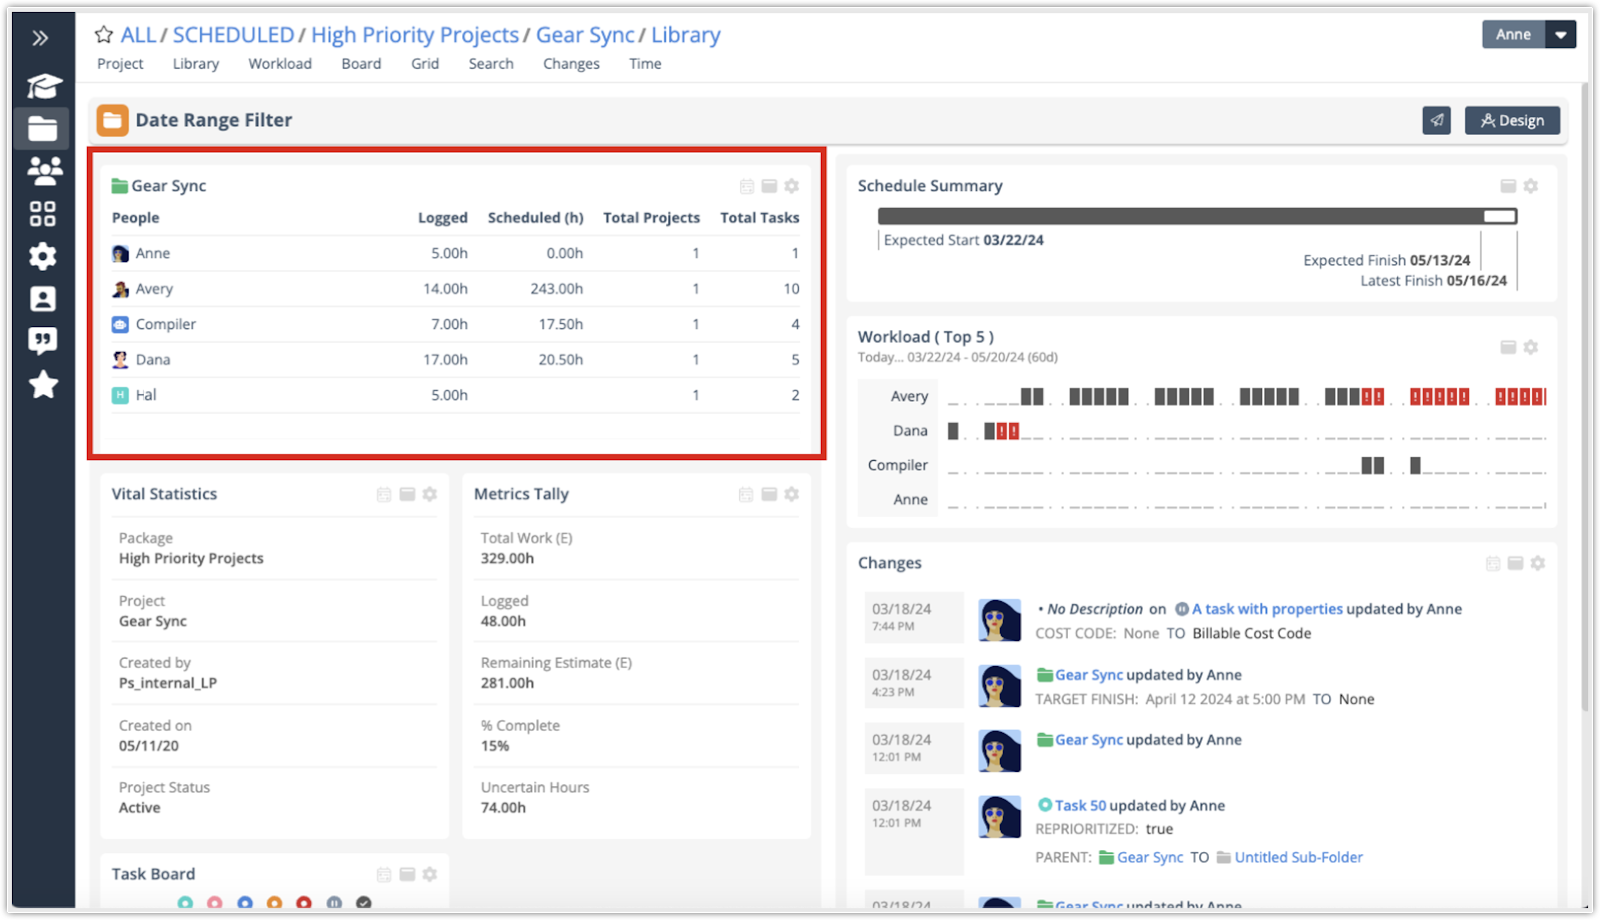
People List Widget in a Dashboard
Key Benefits
The People List Widget is a counterpart to our People Table Report, rounding out our pairings of reports and widgets. Unlike the other pairings that show you a list of projects, packages, and tasks, the People Table Report and People List Widget provide a list of actual users who have an assignment in whatever location you build a dashboard. This pairing also ensures that we offer full feature coverage across reports and dashboards.
The People List Widget allows you to view users’ working, scheduled, and logged hours. Add it to your dashboard and customize settings to for improved visibility of this workload data.
Add the People List Widget in LiquidPlanner
- Navigate to the Dashboard where you want to add the widget.
Note: To learn how to create a Dashboard, visit the lesson now. - Select Design to open the Design Mode view.
- Select + Widget to open the Widget Gallery.
- Select People List Widget.
- Select Add Widget.
After adding the widget, it displays as a tile on your dashboard. You can use the handle icon to drag the widget to your preferred location. You can also select the widget to expand it into a Grid View on the dashboard that shows more data. To change any columns or filters, select the Options icon to access the widget settings.
People List Widget Settings
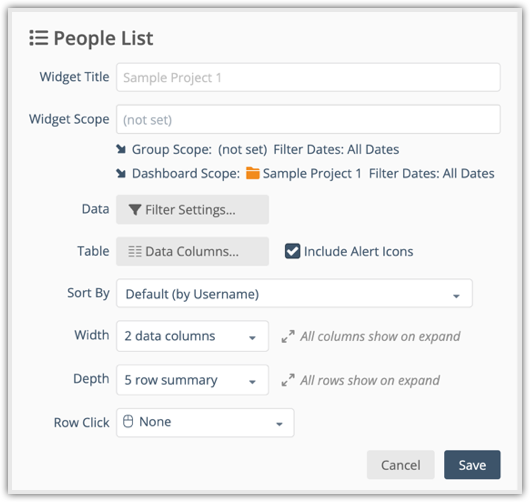
The widget will display everyone with an assignment on a task in the scoped location. You can customize the following settings:
- Widget Title – Incorporate filter parameters in the title so viewers can understand which people are included in the widget and its Changes View.
- Widget Scope – You can scope the widget lower than the current scope but not higher.
- Data [Filter Settings] – Limit the rows by applying Project or Task Status Filters and by filtering on an individual with the “Assigned” filter. You can also use the Date Range filter here.
- Table Data Columns – Add the Columns you want to display and use the checkbox to Include Alert Icons.
- Sort By Default (by Username) – Add the columns you want to sort by.
- Width – The default shows 2 data columns.
- Depth – The default shows 5 rows.
- Row Click – The options for what happens when you click a row include None, Availability, Board, Profile, Timesheet, Workload.