Have you checked your LiquidPlanner profile settings lately? It’s easy to forget what’s tucked inside the My Profile page in your project management tool. Basically, it’s where all of your identifying details in LiquidPlanner live. Whether you’re new to a workspace or you’ve been around a while, here are some basic need-to-knows about managing your settings.
First off, here’s how you get there: From the Setting tab at the top of LiquidPlanner, or by going to the dropdown menu at the upper-right corner of the screen.
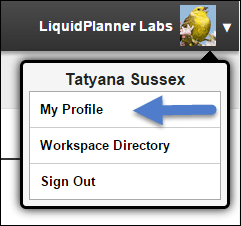
Here’s what your My Profile page looks like:
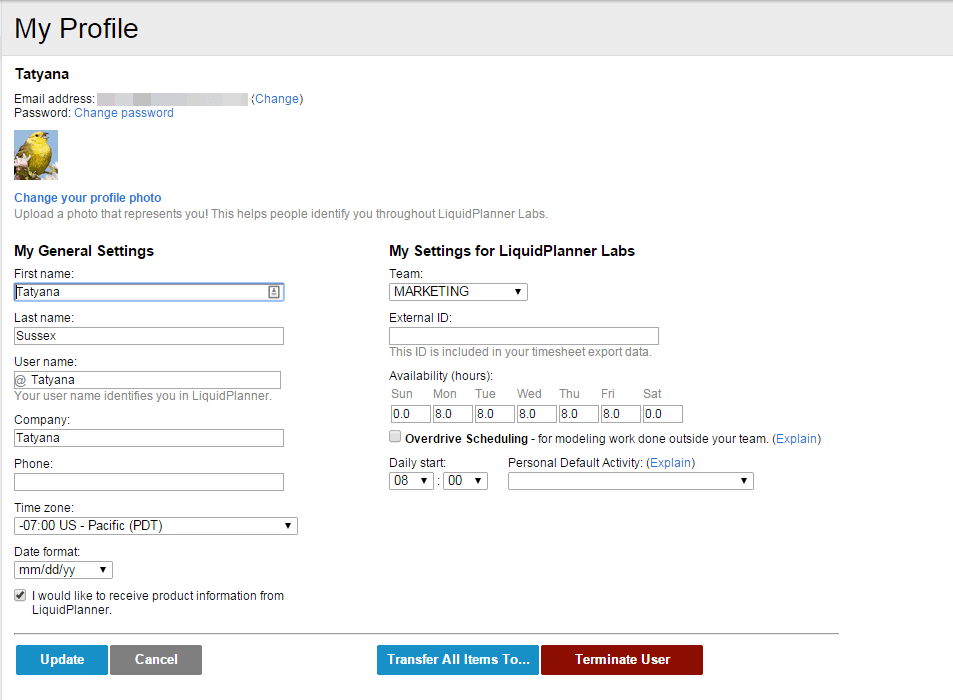
The information in your profile settings is pretty self-explanatory. But there are three settings we want to call your attention to.
- Available hours. The default is set to eight hours a day, Monday – Friday. Your hours might be different, so set them accordingly. It’s important that your availability is accurate, because LiquidPlanner references it when calculating the start dates for your tasks, and it prevents you from being over booked. Workspace owners and co-owners can change availability for other team members via the People page.
- Your avatar photo. This shows up as your main identifier in the LiquidPlanner app. It’s the first time a lot of us see our profile page—to upload our photo.
- Notifications. This isn’t part of your My Profile screen, but you can get to your notifications settings from here (see left-hand menu), and then set your email (and other) preferences.
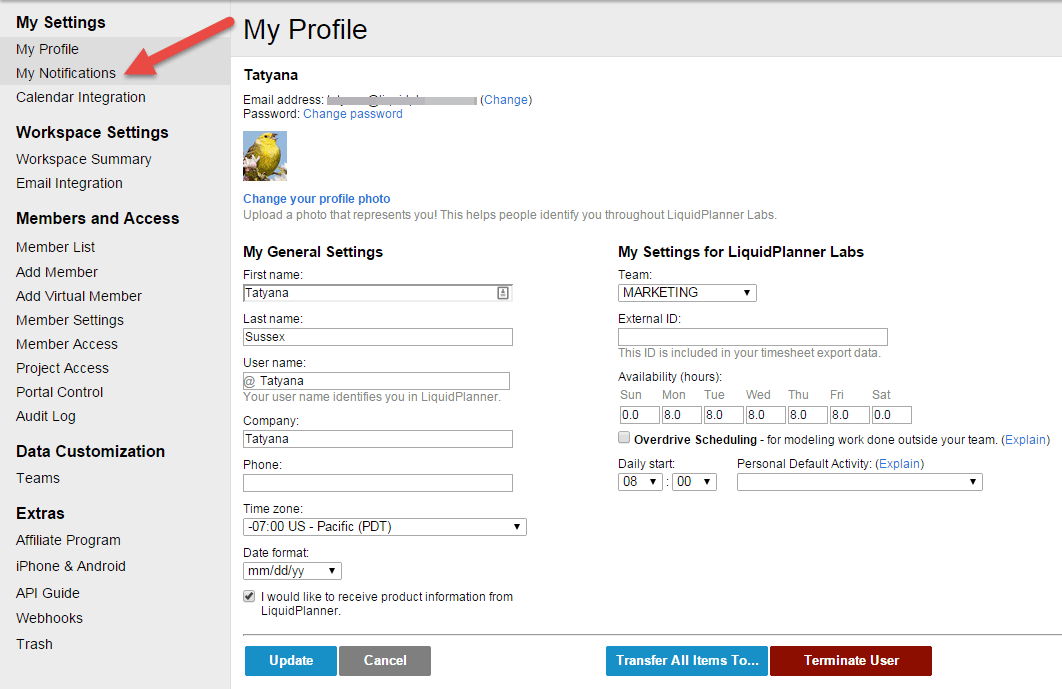
The My Notifications screen lets you make changes to the emails you receive; planning, collaboration and checklist settings, and shows the plan items you’re following. Here’s the menu:

Tell us, how often do you check in with your profile settings?


