I’ve gotten a couple of questions about how I produce the videos for the LiquidPlanner tutorials so I thought I’d take a minute to blog the notes that I passed on to Kevin Merritt (founder of Blist).
I use Camtasia Studio 5 from TechSmith. The folks at TechSmith produce great tools. Just like SnagIt, I’ve really got nothing but good things to say about Camtasia. It is fast to get started producing videos and it has all the features that you’d want. My wish list for Camtasia is extremely short which speaks volumes for its quality.
- Better integration with CMS (we’re using Joomla).
- Fix the strange tendency to have the edit cursor drift on long takes relative to the audio track.
 Now to the details…
For audio I’m using a Samson C03U USB condenser mic set for flat response at 0db. I keep the mic about 4-6” from my mouth and talk across the mic rather than directly at it to prevent pops on my plosives (letters like “b” and “p”). A high quality mic is the best investment you can make for producing decent videos.
When getting ready to record try this speaking exercise:
Breathe in and hold your breath. Feel that “catch” as you start the “hold”? You want to avoid that when recording, it comes through as strained and makes your first word more forceful/loud that is natural. Instead try going straight from breathing in to talking with no pause, smoothly. Alternatively you can say a couple of “throw away” words before the “real words” you want to record. For example, “I really like pie. LiquidPlanner can be used to coordinate…”
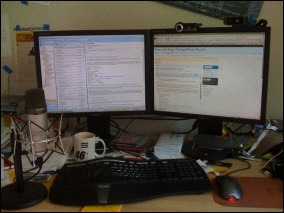
Top pointer… screw with your resolution and compression BEFORE you start recording and try to record at a nice multiple of the screen size you want in the output. I set up a capture window that has a 1200×900 view port and then capture just the part that I care about (like I skip the Firefox menus). That’s 1.5x the final resolution.
Here are the production settings I use for Camtasia:
- Adobe Flash (SWF) movie file:
- Colors: True Color+ (32-bit)
- Frame Rate: 10
- Size: 800×600
- JPEG Encoding: Enabled
- JPEG Quality: 75
- Playback controls: Advanced
- Pause at start: Disabled
- Allow resizing: Enabled
- End action: Jump to URL (/blahblah-video-done.html)
- Audio Format: MP3
- Audio Attributes: 22.050kHz, Mono, 32kBits/sec
- Watermark: Disabled
- HTML: Enabled
- Table of Contents: Disabled
- SCORM: Disabled
See that “Jump to URL” thingie above? I use that to get viewership metrics. I can tell how many people hit the video and how many watch it to the end because each video sends them to a unique URL after viewing.
When beginning production clear all the zoom and pan stuff and then insert it manually after all of your edits are done.
Top 5 Tips for Video Tutorials
- Setup resolutions and sizes first.
- One topic to a video and keep ‘em short.
- Make your “takes” as long as possible. It is better to just stop when you make a mistake and start over from where you were while still recording. You can always edit it down later.
- Use the pause button (F9) as it will move the cursor back to where you pressed pause when you un-pause.
- Don’t get too caught up on the script. Get post-its and build a bullet point list of what you want to hit and then do it a couple of times to get it right. Kinda like prepping a short canned demo for a conference.
That’s the bulk of the tips and tricks I know. I should someday post an outtake reel. I sit in the office with headphones on while recording and swear like a sailor between (and sometimes during) takes.