 Schedule a demo of LiquidPlanner with a product expert today

In-line editing is available on Your Personal Columns Display for quick edits, such as updating a plan item’s owner or a custom field value. For more detailed information about an item, including scheduling, collaboration and documentation, or to make additional changes, you can access LiquidPlanner’s single-page scrolling edit panel.
On the Projects tab, open the edit panel by double clicking the plan item name. The edit panel will anchor to the right of the screen.
There are seven other places in LiquidPlanner where you can open the edit panel by clicking on plan item names: Home, My Work, Timesheets, Search, My Calendar, My Status Report and Dashboards. In these locations, you’ll see a stand-alone edit panel that can be moved and resized by dragging the edges of the panel window.
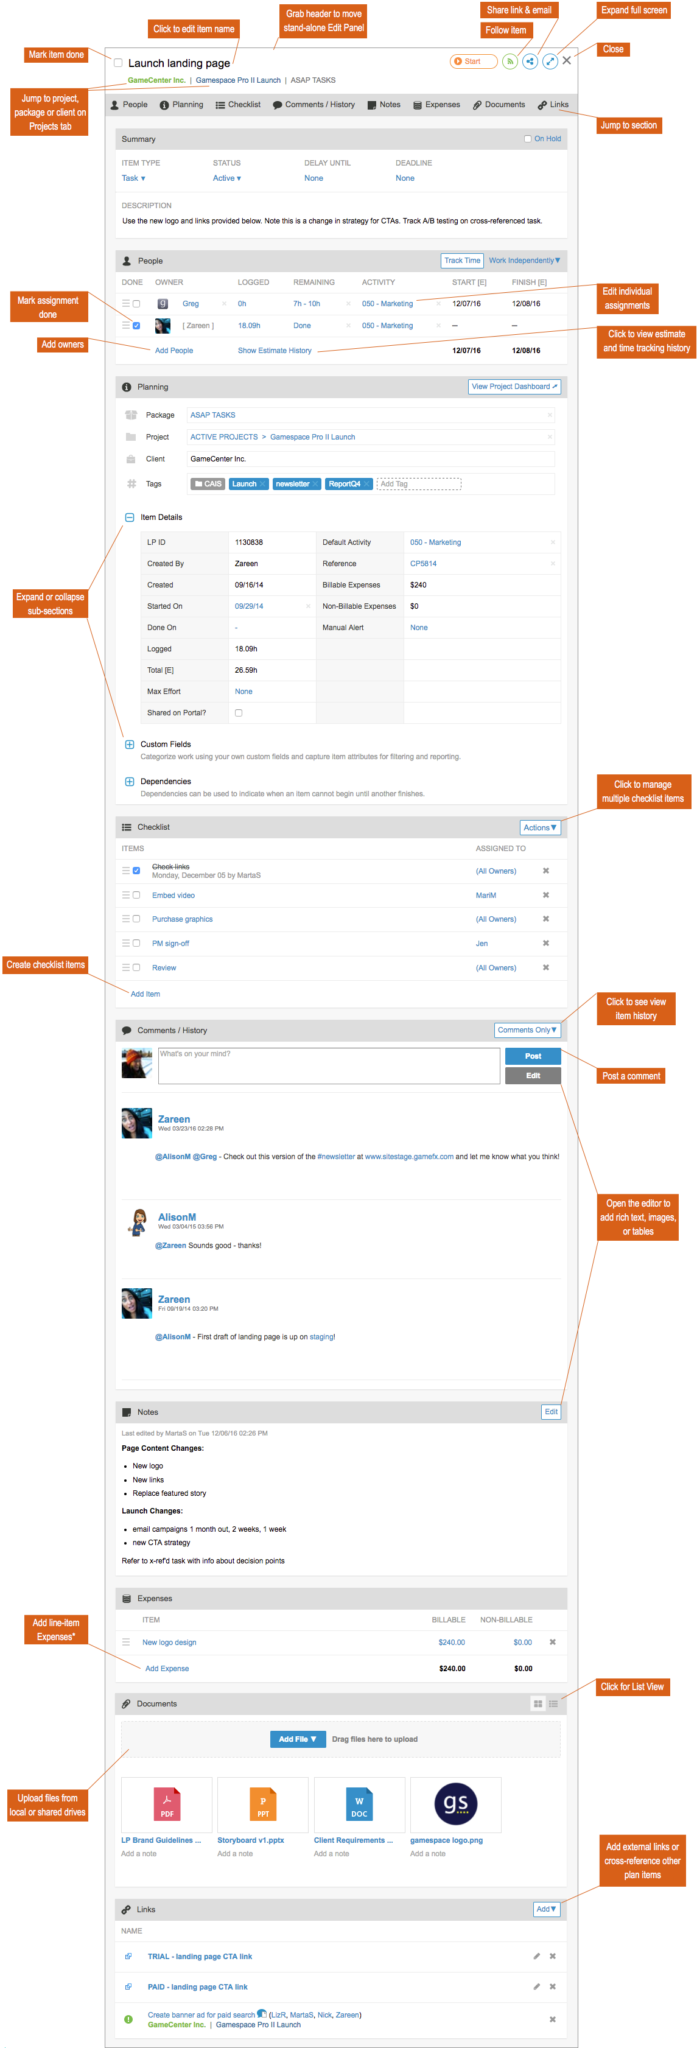
Edit Panel Tips
- To change the title and rename an item, simply click on the existing item name at the top of the edit panel.
- Click the links at the top of the edit panel to quickly access edit panel sections without scrolling. Click the same link again to return to the top of the edit panel. The links displayed at the top of the panel vary depending on the plan item selected. For all items, they provide access to the People and Planning sections, comments and history, notes, documents, and links.
- The Planning section has three collapsable subsections for Item Details, Custom Fields (task and project edit panels), and dependencies.
- Task, milestone and event edit panels have a checklists section and an Expenses* section.
- Project edit panels have sections for Project Team and Activities as well as a gear icon in the panel header that provides links directly to settings for Project Access and Portal Control.
- Print the edit panel from full-screen view.
- Changes to a plan item are recorded in the Comments/History section. Use the Actions dropdown to select a view.
- Multiple owners can be added to tasks, milestones and events only.
- A link to View Project Dashboard will be in the project folder’s edit panel, and tasks within the project. It’s visible in the edit panel for members of the project team (except Restricted Members) and anyone else who has been invited to the dashboard. This link takes you to the designated project dashboard.
- A link to View Sub-folder Dashboard will be in the sub-folder edit panel, linking directly to the designated sub-folder dashboard.
* The Expenses feature is available with the Enterprise plan only.
Refreshing After Edits
When you make changes in the edit panel, you’ll notice that the edited items in the plan hierarchy will go gray. This is to signal that you have not refreshed since the last time you edited those items. Use the refresh icon to immediately update the schedule.
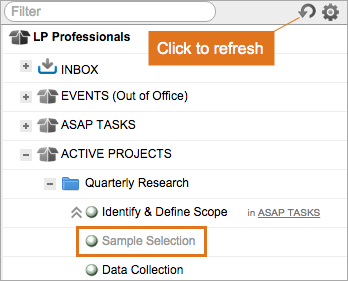
This refresh will happen naturally the next time something triggers a schedule update. However, depending on the edit you made, you might not want to wait for that. Specifically, if you make an edit that would change the location of the item in your plan hierarchy, it won’t be displayed in the new location until you refresh. If you reassign and re-estimate a task, you will still see the old owner and estimate until refreshing, or clicking the green Schedule Ready button at the top of the workspace.