Here at LiquidPlanner we’ve identified four main stages our customers go through to optimize their projects and processes. Our most successful customers don’t try to “eat the elephant,” so to speak, as soon as they buy LiquidPlanner. They know that change and progress occur in steps.
Throughout this series of blog posts, we’ll discuss each of the four stages to LiquidPlanner success.
The Four Stages
Onboarding is the first stage in optimizing your usage of LiquidPlanner. This stage occurs when teams are just getting started with setting up the LiquidPlanner workspace. Once the team is invited to the workspace, they’re getting accustomed to the primary aspects of the tool, such as logging time and posting updates to tasks.
The second stage is adoption. In this stage, teams have really gotten used to the basic aspects of LiquidPlanner, and we’re starting to get insights into how the team actually gets work done; for example, what they spend most of their time on.
The third stage is refining, where the project managers are getting ahead of issues and risks by using many of LiquidPlanner’s reports and alert features to keep their projects in line.
The last stage is optimizing. Teams at this stage have gotten a handle on how to use LiquidPlanner to proactively manage risks and make the most of team member availability. With a lot of project data in LiquidPlanner by now, this is a good time to use baselines to look back and see if actuals met initial projections.
Onboarding
The onboarding phase is all about setting up your workspace, establishing your workflow, and kicking off LiquidPlanner to your team. Typically, this phase is the responsibility of just those people who make decisions about plan structure and workflow.
During your onboarding stage, remember this well-known bit of wisdom: “Don’t let perfect be the enemy of good.”
You don’t have to have your workspace populated to perfection before launching LiquidPlanner to your team. Remember that LiquidPlanner is a collaborative tool, and it’s actually designed to adapt to the very imperfect realities of work management. Once you get your key data loaded and get your team in there, you’ll soon discover together the best ways to optimize LiquidPlanner for your team.
Three Key Inputs for LiquidPlanner
You need to focus on three key data points when setting up your workspace in LiquidPlanner: resource availability, remaining effort estimates, and priority order.
Resource availability is set in each person’s profile. Be sure this accurately represents only the time available for your assigned work in LiquidPlanner. Daily availability should be scaled down to account for the average amount of time you spend each day on activities not represented as assigned tasks in LiquidPlanner.
The second key input is the task’s remaining effort estimate. This should represent the best case/worst case number of hours you still need to put in on that task to complete it.
The third key input is the priority order. You want to list the projects themselves in general priority order and, likewise, the tasks within each project.
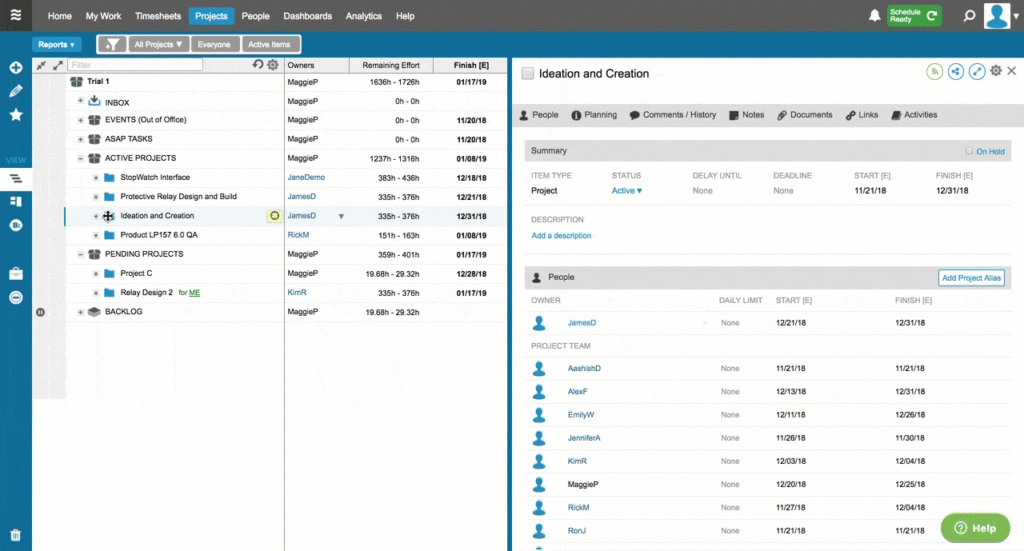
With these basic inputs, LiquidPlanner will schedule each person’s tasks in the order in which they are listed on the Projects tab.
Scheduling Constraints
When setting up your workspace initially, you can account for any scheduling constraints your organization might have.
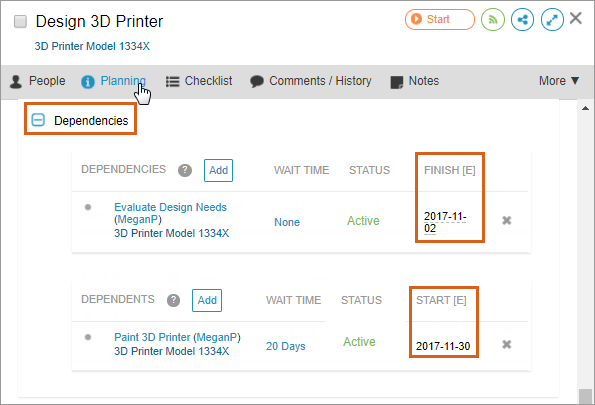 The first of these is dependencies. In LiquidPlanner, dependencies are most often created between tasks owned by different people; they can also be used to model wait time between tasks.
The other scheduling constraint to consider is that we’re all sharing resources across multiple concurrent projects. This is the time to ask yourself if you should use the daily limit feature. A daily limit tells LiquidPlanner that it shouldn’t schedule the task owner to work any more than the designated number of hours per day on that project task.
Once you have entered the three key inputs and have accounted for the most common scheduling constraints, you’re well on your way to a realistic schedule.
Activities
Let’s switch gears and look at one more feature you might want to set up before kicking off LiquidPlanner: activities. Activities are used to classify logged and remaining hours and are especially useful if your team will be tracking time in LiquidPlanner.
Set up activities in the data customization settings. Each activity is a classification and can be designated as billable when appropriate.
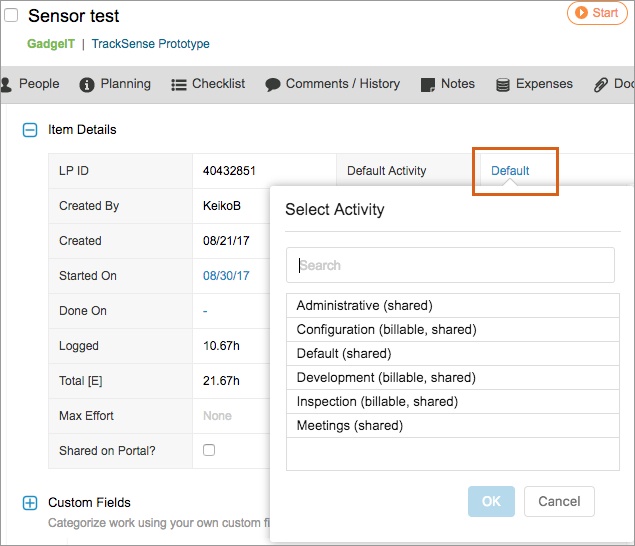 You can also select a default activity for a task. This is the activity that will be used to classify the remaining hours for this task. Then, when time is logged to this task, the activity is automatically selected to classify the time entry hours. You can change the time entry to something different if appropriate.
We encourage the use of activities because they can drive valuable analysis into how your project hours are distributed by classification and billable status.
Kickoff
Now it’s time to kick off LiquidPlanner to the rest of your team.
Create a LiquidPlanner playbook and share it with your team members. This ensures everyone understands the rules of engagement for your workspace.
If you worry about your team getting overwhelmed by a new tool, new processes, or too many details, think about focusing your team at first on just the updates necessary for accurate scheduling: logging time, maintaining accurate task estimates, marking things done.
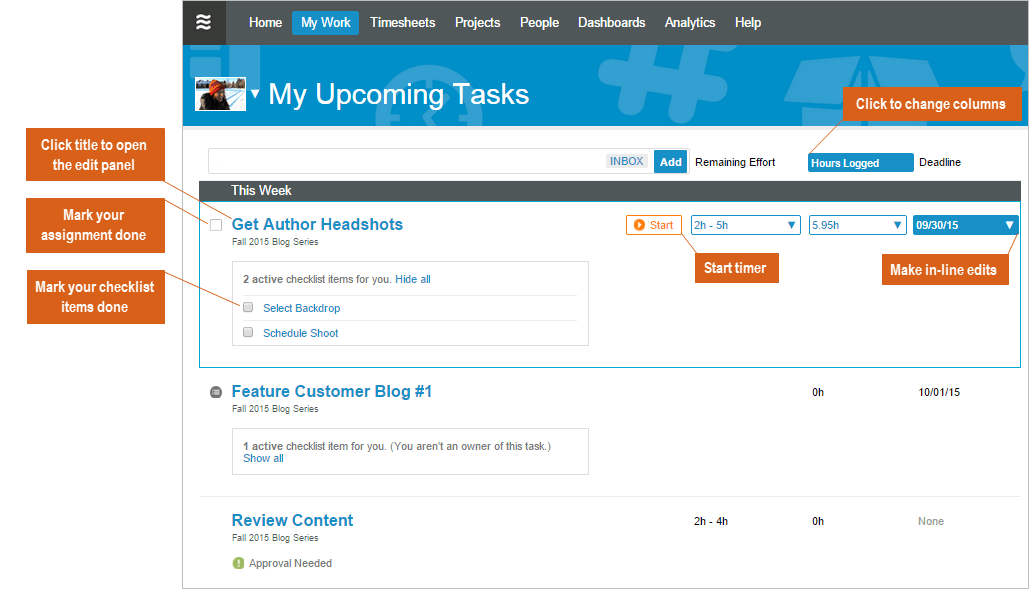 All of this can be done in the My Work tab, which is a great view that keeps people focused on just the tasks they are assigned to, listed in start-date order.
Establishing a handful of basic daily habits is a great foundation that you can build on as you move further into your implementation.
In the next part of this series, we’ll talk about adoption and how to gain insights from your team’s usage of LiquidPlanner.


