
Editor’s Note: This is Part 1 of a series about using Your Free LiquidPlanner Trial . For more advanced tips, check out Part 2.
We want to help you make the most out of your LiquidPlanner ULTIMATE trial. This guide walks you through how to get a sample project up and running—so you can maximize your free 2-week trial.
By creating sample projects, you get hands-on experience understanding our unique scheduling methodology. LiquidPlanner’s predictive scheduling calculates when your projects are expected [E] to finish based on priority, resource availability and ranged estimates of effort. It also recalculates your dates dynamically as things change.
Let’s get started!
Step 1. Add your members and resources.
Adding members/resources to LiquidPlanner is necessary to have people to assign work to (unless you want to take on every task for your team!).
In the People Page of your trial, click +Member, +Resource, or +Placeholder to quickly add that to your Workspace.
Step 2. Set members’ weekly availability.
Now that you have members and resources in your trial workspace, you’ll need to adjust their availability. This tells LiquidPlanner how many hours a resource has available each week to work on projects. This goes into the schedule calculation.
Workspace administrators can adjust availability for members via the People Page > select member/resource name > navigate to “Availability” > Enter Working Times.
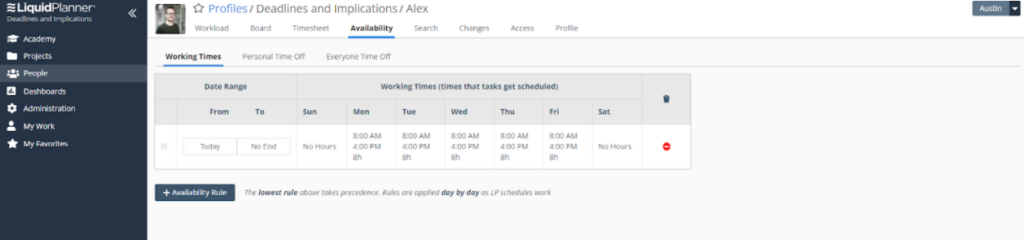
Pro Tip: Default availability is 8 hours per day, but most resources have weekly meetings, break times, or time spent on email that would not be built into LiquidPlanner project timelines. 5 to 7 hours per day might be a more accurate availability for your resources.
Step 3. Add a project.
You can add projects via the Projects View tab.
Step 4. Add tasks to your project.
Once you’ve created a project, the next step is to add tasks. A task is the most basic building block in LiquidPlanner and represents an individual work item for a project.
First, click on the project you created in Step 3, and then add tasks where it prompts you at the bottom of the screen. Pop open the Task window, you can enter the task name, assignments, owner, and estimate.
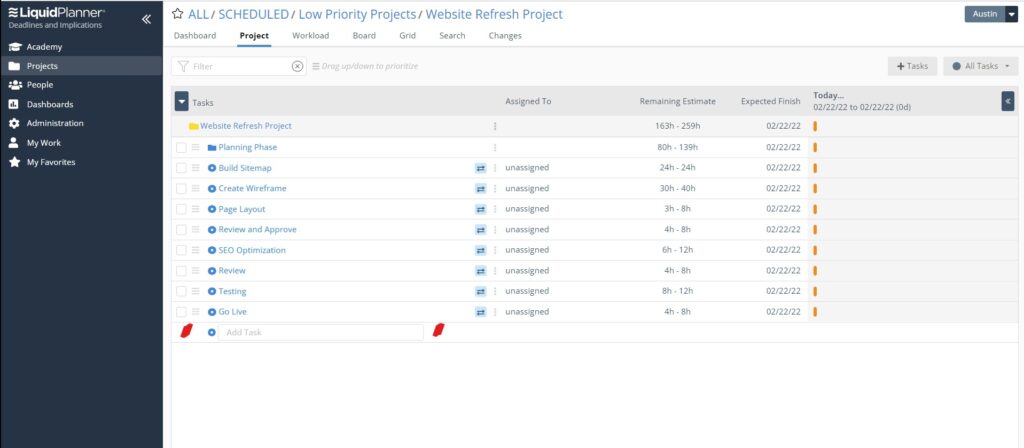
Ranged estimates: Enter a best-case / worst-case range of effort (in hours) for the task. A range will build a natural buffer into your project plan and account for natural uncertainty that comes with project planning.
Pro Tip: Use the Add Multiple to bulk-add up to 30 tasks at one time or the Excel Import for up to 100 tasks at a time.
Step 5. Congratulations!
You’ve successfully set up a project, and your project now has a predicted start and finish date – Start [E] and Finish [E] the “[E]” stands for “Expected.”
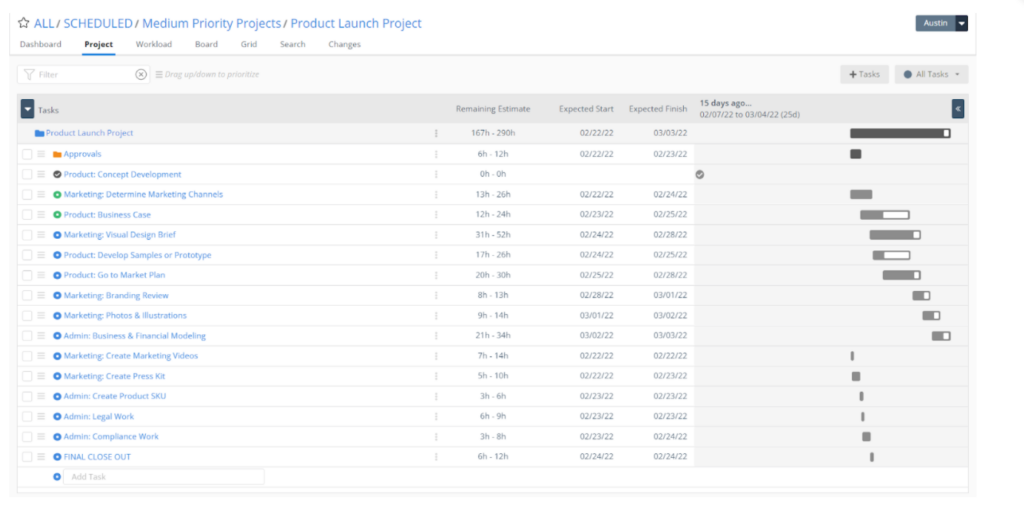
LiquidPlanner calculates your expected dates based on 3 factors.
- Priority. Priority is arranged top to bottom. The scheduling engine will schedule out each project and task in order of priority from top to bottom.
- Resources. LiquidPlanner will use the task owners’ availability (that you set earlier) to calculate when they can complete the task.
- Estimation of effort. Using this best-case/worst-case scenario, LiquidPlanner adds that to the calculation, giving you expected start and finish dates, as well as a worst-case finish date.
To take it a step further, check out the second part of this series, where you explore the scheduling engine.
Have more questions? Feel free to book some time with our Product Advisors.