Editor’s Note: This guide is Part 2 of our series on making the most of your LiquidPlanner ULTIMATE trial. Start there first to create a good foundation for your trial.
In the first part of this series, we walked through setting up a project. In this post, we’ll walk you through how to experiment with the scheduling engine to learn how LiquidPlanner calculates when your projects will be done.
As always, please contact our Sales team with any questions throughout your trial (or if you’d like to start one!).
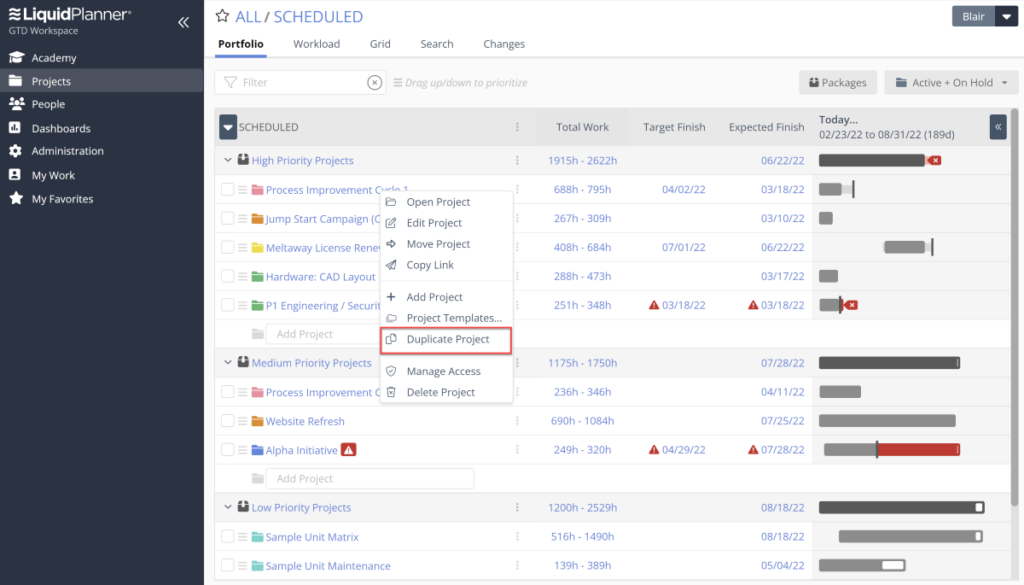
Step 1. Create multiple projects
This step sets you up to learn how project schedules affect each other in LiquidPlanner. Use our duplicate feature, or use Part 1 to ensure you have multiple projects in your Active Projects Package.
Step 2. Add Project Deadlines
In the Project Edit Panel, add a deadline to your project (access this by double-clicking on the project name). Maybe this is the date you’ve promised your client or the date you’ve promised an executive. LiquidPlanner will track the schedule against this date and the potential project risk.
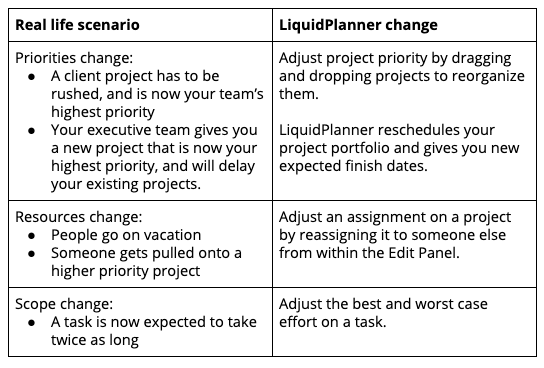
Step 3. Make adjustments and see your schedule change
As projects progress, things change. LiquidPlanner’s scheduling engine allows you to adapt to those changes in seconds, and have a new realistic expected finish date for your projects.
Test out the following changes, and see how your Finish [E] dates change. If any projects are expected to finish later than the deadline you set in Step 2, they will turn red.
Ready to use what you’ve learned? Why not start a free LiquidPlanner trial today?