 Say hello to the new Tempo! LiquidPlanner is now Portfolio Manager.
Meetings are an inevitable part of our everyday working life. Effective, productive meetings let you work through complex issues face-to-face and move projects forward. Unfocused, unnecessary, soul-crushing meetings just take time away from actually getting the work done.
While your LiquidPlanner workspace is a really great place to keep a record of project status when it comes to remaining effort, budget, comments, etc., it’s not meant to replace the kind of meetings that are needed to get the project team on the same page. Using LiquidPlanner to plan and run meetings will help you and all of your attendees focus on the truly important conversations. In this guide, you’ll learn how to use LiquidPlanner to drive four types of meetings: The Project Kickoff, The Status Update, The One-on-One, and The Stakeholder Briefing.
Making the Most of Your Time
First off, review the 10 meeting best practices below. You might already be familiar with the list, but it bears repeating:
- Decide if you really need the meeting – this is number one for a reason!
- Set an agenda and time limit
- Choose your audience wisely
- Organize the information
- Start on time
- Be engaging and encourage participation
- Keep it on track
- Keep it professional
- Sum it up
- Finish on time
Learn more about each of these tips in more detail in our blog post, 10 Tips for Effective Meetings.
Using LiquidPlanner to Run Meetings
Here are a few types of meetings where using LiquidPlanner will help you set an agenda and run an organized, focused meeting:
The Project Kickoff
If you’re working on a large-scale project, kickoff meetings help all team members understand their roles within the scope of a project.
Prior the meeting, put the project specifications in writing and make sure it’s available to everyone involved. We use the Google Drive integration and add a Google Doc to the documents section of a task in LiquidPlanner. This way, team members can always access the current version.
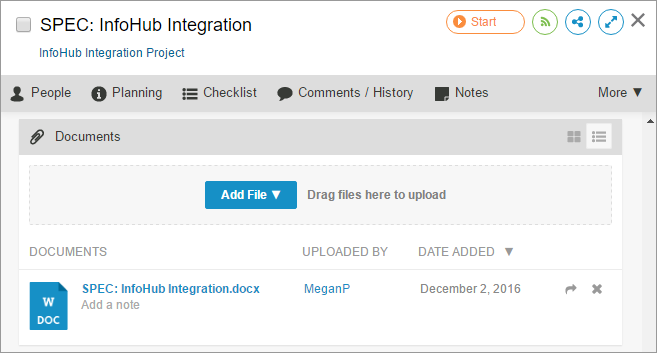
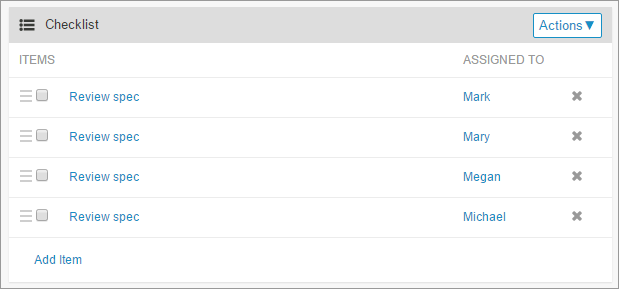
Then, create checklist items and assign them to the members that must review the doc before the meeting.
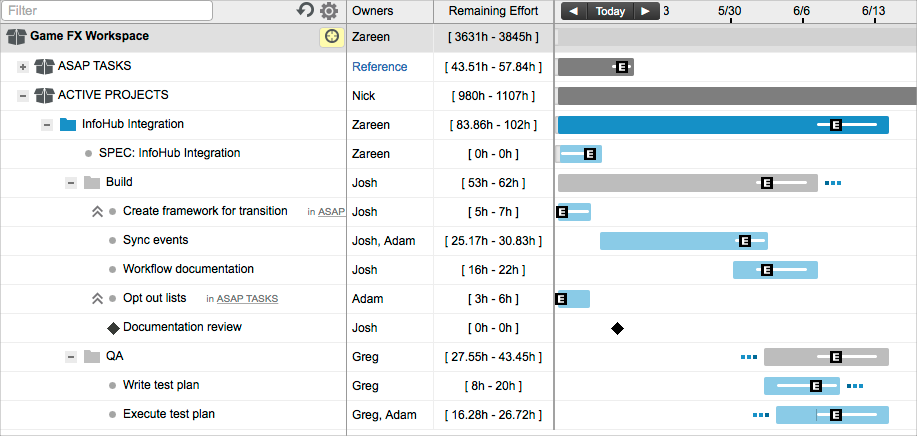
Finally, display your workspace during the kickoff meeting and run through the plan on the Projects tab with the project team. This helps everyone become familiar with how the project is structured in LiquidPlanner and how it’s prioritized in the context of their other work.
Here are a few other tips for your project kickoff:
- Make sure that everyone understands priorities, ownership, and the timeline as you go through the plan in LiquidPlanner.
- Get input from the project team, especially with regard to effort estimates, and make updates to the plan during the meeting so that you can see the impact to the project’s schedule as a group.
- Keep it short, simple, and fun – you want to start your project off with a happy team and high morale!
The Status Update
With LiquidPlanner, you can see real time status at any time. So instead of getting a recap from each person on the team, status meetings can be used to focus on real issues. Face-to-face communication with your team at regularly scheduled intervals also keeps up the momentum of the project and promotes team communication and accountability. These meetings should be short – around 30 minutes – and are used to align the team on progress, challenges, and next steps. And, if relevant problems are identified and good decisions are made, your team will recognize the meeting as productive, instead of a waste of their time.
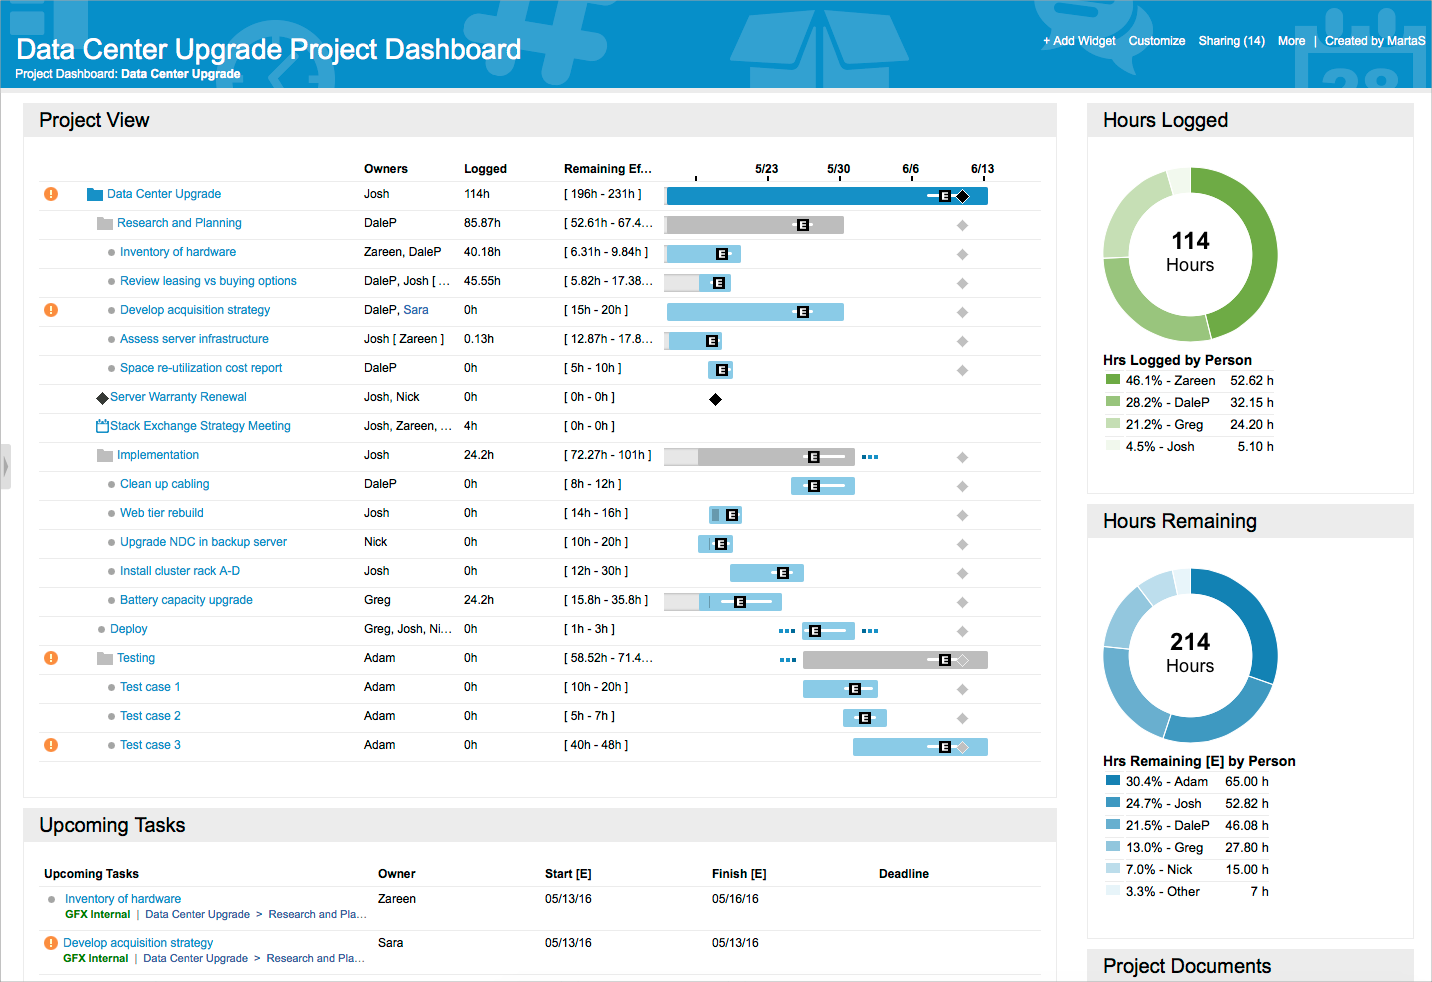
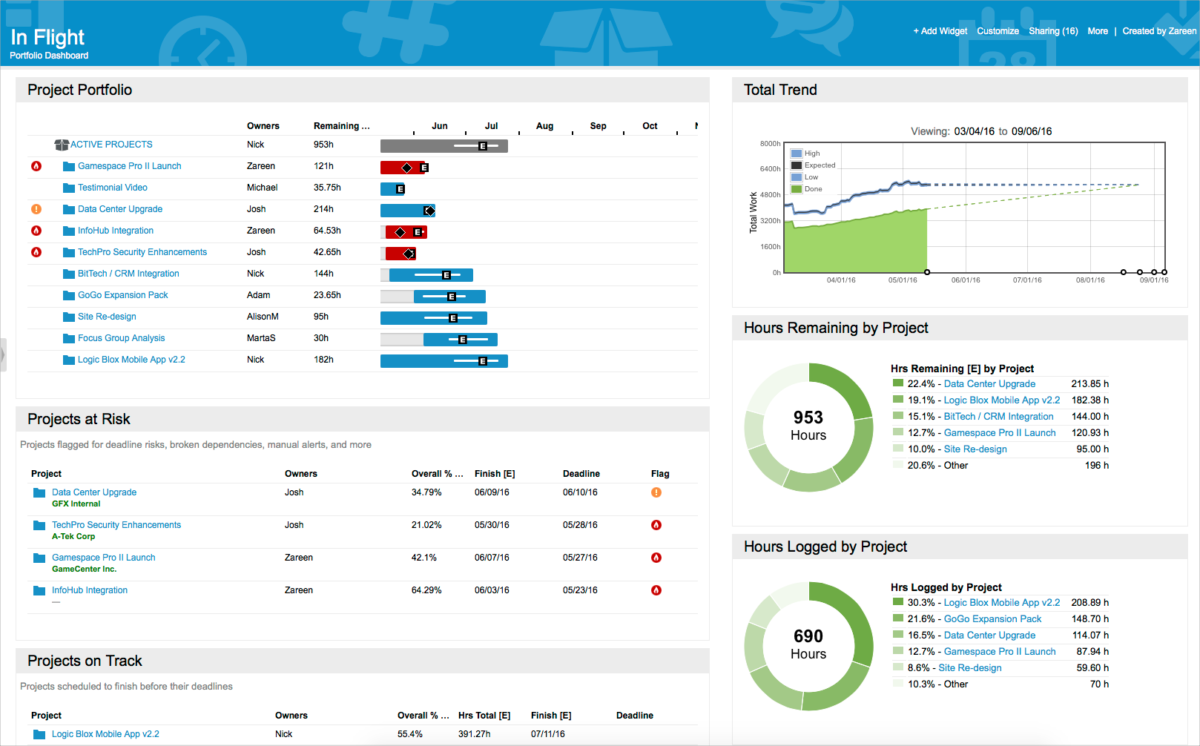
Here’s how to use a project dashboard to facilitate open communication during a project status meeting:
- Click on View Project Dashboard in the edit panel to show the real time schedule and data for the project.
- Review the Project View widget as a group to confirm that the schedule is on track. By default, the widget’s plan depth will be set to Top Level, but change this to Full Plan and increase the max rows to see all of the tasks within the project. If any active tasks have [?] or 0h-0h as the Remaining [E], ask each task owner for an updated estimate and add it during the meeting by simply opening the edit panel for the item within the dashboard. Or, if the work was actually completed, remind the team that they must track time and mark tasks done in order for the project schedule to be accurate.
- Pay special attention to any risk alerts that you see. If a deadline is at risk, this is a good time to find out if there is anything blocking your team members’ work and what can be done to get the project back on track.
- Congratulate the team on their steady progress by calling attention to the Hours Logged donut widget.
Read our guide, What is the current status of my project?, for more information.
The One-on-One
Managers who have regular one-on-one meetings with team members get an improved sense of what their resources need to get the job done. Team members, on the other hand, get focused attention on work goals and career development. Plus, the opportunity to build rapport, get people aligned with project visions and understand their purpose also increases performance and engagement.
If you’re a team member, these meetings are in many ways for you. Here are a few ways you can use LiquidPlanner to guide the conversation with your manager:
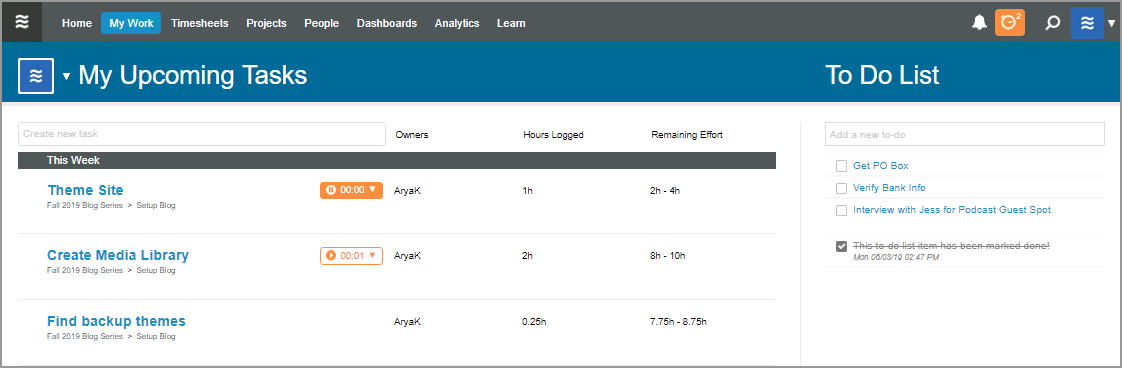
- Pull up your My Work task list and run through your priorities. This will help you arrive prepared with a list of topics, ask those pressing questions, share your accomplishments, and get any advice or direction you need to move forward or feel inspired again.
- Run a Personal Status Report from the Home tab to show your overall progress and/or planned work over a specific date range, like last week or a 3 week window.
- Create your own view with a custom dashboard and add widgets to show what you’ll be working on and what you’ve recently completed. You can add donut widgets to show personal progress and note widgets to document your goals or keep track of important topics that you discuss during your one-on-one. See the Dashboard Gallery for more ideas.
- Run the Resource Workload report, filter to yourself and select a timeframe. Use this report to view all of your assigned work across all projects in the workspace. Pay attention to workload bars displaying in red indicating that something you’re assigned to in the selected timeframe is at risk of missing a deadline. This report will help highlight when you’re overbooked or when you may have available hours to take on new work.
The Stakeholder Briefing
Presenting to executive sponsors and stakeholders strikes fear into the hearts of PMs everywhere. Whether you’re sharing project status, requesting approval for funding, or providing an update on a newly introduced risk, these types of meetings are a regular part of your work life. The most important thing to remember is that senior leadership requires different information than your team. As long as your presentation is focused and relevant to your audience, you have nothing to fear!
Use dashboards and reports as supporting visuals during your stakeholder updates:
- A pre-built Portfolio Dashboard is a good place to start, but be sure to add more widgets to show the data that you know your stakeholders are interested in.
- Use the Projects View widget to talk about the current timeline at the project level.
- Add a Trend Chart widget to show show overall progress compared to the estimated scope (total [E]) over time.
- Call attention to any risks in the Projects at Risk table widget and be prepared to give a short explanation of what you’re doing to address those risks.
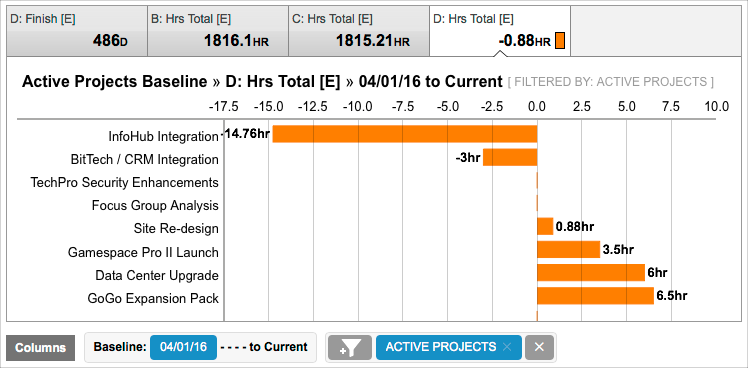
- Pull up a saved Baseline Analytics report that you created to show how projects are operating compared to the scope at a specific date in the past.
See our 4-part guide, Using LiquidPlanner Data to Monitor and Control Your Projects, for more information.
Note: Advanced Analytics and Dashboards are available with the Professional and Enterprise plans only. For additional pricing plan details, please see our Pricing page.
Related Articles
Full-Day and Partial-Day Events
Dashboards
Personal Status Report