Navigate to Administration in the left-side menu to access Rate Sheets. This lesson discusses two types of Rate Sheets: Billing Rate and Pay Rate, which can be set up by Org Admins and Workspace Managers. Rate Sheets are a premium feature in the PROFESSIONAL and ULTIMATE Plans. Timesheet Exporter & Cost Viewer privileges are required in order to view rate sheet information.
| 1 | Rate Sheets for Projects |

Customize Rate Sheets to establish billing and pay rules that can be used on projects. Rate Sheet Rules are designated by Person or Resource, and once a Rate Sheet is associated with a project, its rules are applied as progress is logged. Rates can be categorized as billable or non-billable using Cost Codes.
This lesson for Org Admins and Workspace Managers explains how to create, edit, and archive Rate Sheets. To learn about creating billable and non-billable cost codes, visit the Customizable Cost Codes lesson. Use the Timesheet Review & Export lesson to learn about downloading tracking data into an Excel file for billing and analysis.
| 2 |
Rate Sheet Settings Table # |
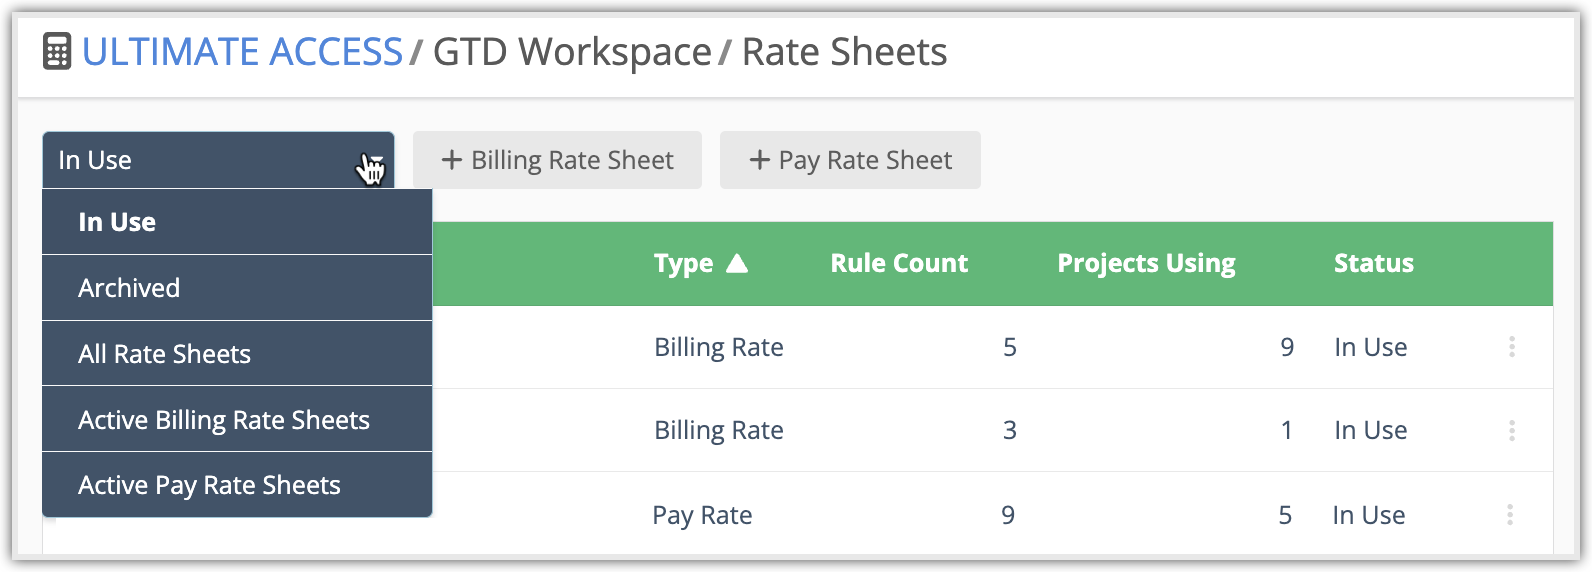
The main Rate Sheets page contains a table of Billing Rate and Pay Rate sheets. Here, Organization Administrators and Workspace Managers can create new Rate Sheets and edit/rename/archive existing ones. Timesheet Exporter & Cost Viewer privileges are required to access the Rate Sheet table.
From this page you can select:
Drop down menu: Filter to see Rate Sheets that are In Use, Archived or view All Rate Sheets, Active Billing Rate Sheets, Active Pay Rate Sheets.
+Billing Rate Sheet Create a new Billing Rate sheet.
+Pay Rate Sheet Create a new Pay Rate sheet.
Rate Sheets are always listed in alphabetical order on the table. These are the table columns:
Rate Sheet Name: Select a name to open the rules page of the rate sheet.
Type: The type of Rate Sheet.
Rule Count: Count of rules per rate sheet.
Projects Using: Count of Projects using the rate sheet.
Status: In Use or Archived.
3-dot menu: Rename or archive a sheet.
| 3 |
Create & Manage Rate Rules # |

Rate rules are based on Cost Codes and associated with People or Resources. The rate is applied when they log progress.
From this page you can:
View projects using the Rate Sheet: Select the Projects Using link at the top. The number in parenthesis is the total number of projects using it including Active, On-Hold and Done.
Go back to the Rate Sheet Table: Select Rate List in the breadcrumb above the rules.
Creating Rules
Cost Code: Select a Cost Code from the drop down or use * to indicate that the rate can apply to any tracked time. A rate can be set at zero.
Person or Resource: Choose a Person or Resource from the drop down or use * to indicate that the rate can apply to anyone.
Billing Rate or Pay Rate: Hourly rate applied when time is tracked. Rates use the currency setting on the Workspace Settings page.
Effective From: Date that the rule takes effect. If a past date is selected, the rate syncs up with the tracking history.
Add Rule: Create the rule.
Managing Rules
Rule order is important because when people log progress, rules are applied based on the first match. Rules that are based on the * should appear below rules that specify cost codes, people or resources.
Change the order: Use the drag bars on the left to change the order of the rules listed in the table.
Deleting Rate Rules: Use the X on the right to delete a rule. Deleting a rule removes it from the tracking history for that project. If you accidentally delete a rule, create a new one with the same Effective date and history will sync up again.
Updating Rules: Rules can’t be edited. When you need to change a rule, create a new one to replace it and set the Effective From date to correspond with the day that the change should take effect (past date, today or future date). Place the new rule above the old rule. Keeping the old rule preserves its tracking history.
| 4 |
See projects using the Rate Sheet # |
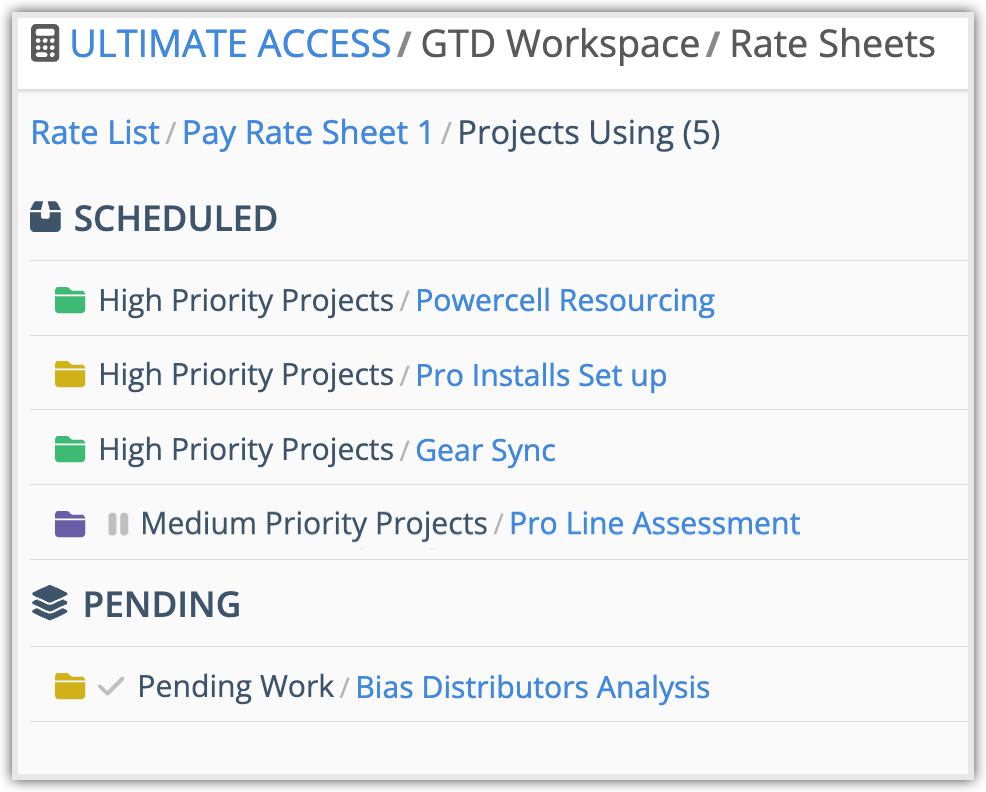
“Projects Using” is the page where you’ll see all the projects using the Rate Sheet. The number in parenthesis is the total number of projects using it including Active, On-Hold and Done. Projects are listed by Collection. Clicking on a Project name takes you to its Project View.
Go back to the other Rate Sheet views using the breadcrumb above the Collections and Projects.
Return to the Rate Sheet by clicking the rate sheet name.
Return to the Rate Sheet Table by clicking List.
Users with Timesheet Exporter and Cost Viewer privileges can display rate sheet columns in priority and grid views.
| 5 |
Associate Rate Sheets and Projects # |
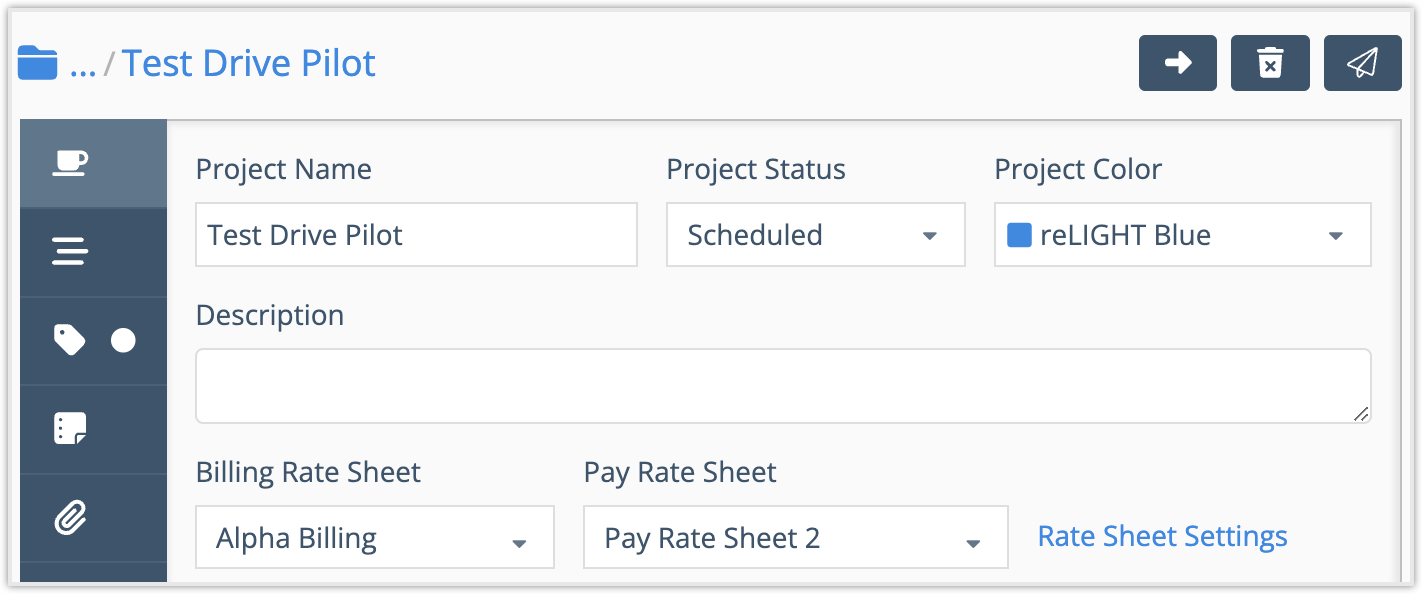
Org Admins, Workspace Managers and Project Managers with Timesheet Exporter & Cost Viewer privileges can associate Billing and Pay rates to projects. There are two editing locations:
1) Project Edit Panel Planning Tab
2) Bulk Edit Modal while in Priority and Grid Views
| 6 |
Change Rate Sheet name or status # |

Rate Sheets can be renamed, archived and reactivated. Use the 3-dot menu in this table to make changes.
When a Rate Sheet is Archived it remains associated with Projects, but it cannot be added to new ones.
Archived Rate Sheet history can be exported using the Timesheet Export for all projects associated with the Rate Sheet.
The tracking history is preserved as long as the archived sheet remains associated with the project. If you accidentally clear an archived rate sheet from a project, reactivate the sheet and add it back to the project, then archive the sheet again.
Reactivate an Archived Rate Sheet

To reactivate a Rate Sheet after archiving it, change the table display to Archived or All Rate Sheets so you can see it, then open the 3-dot menu and select Reactivate.
Reactivating a Rate Sheet means it can be selected again for other projects. It can even be applied retroactively. As soon as the sheet is associated with a project, tracking history will sync up with the rate sheet.
| 6 |
Rate Columns in Timesheet Export # |
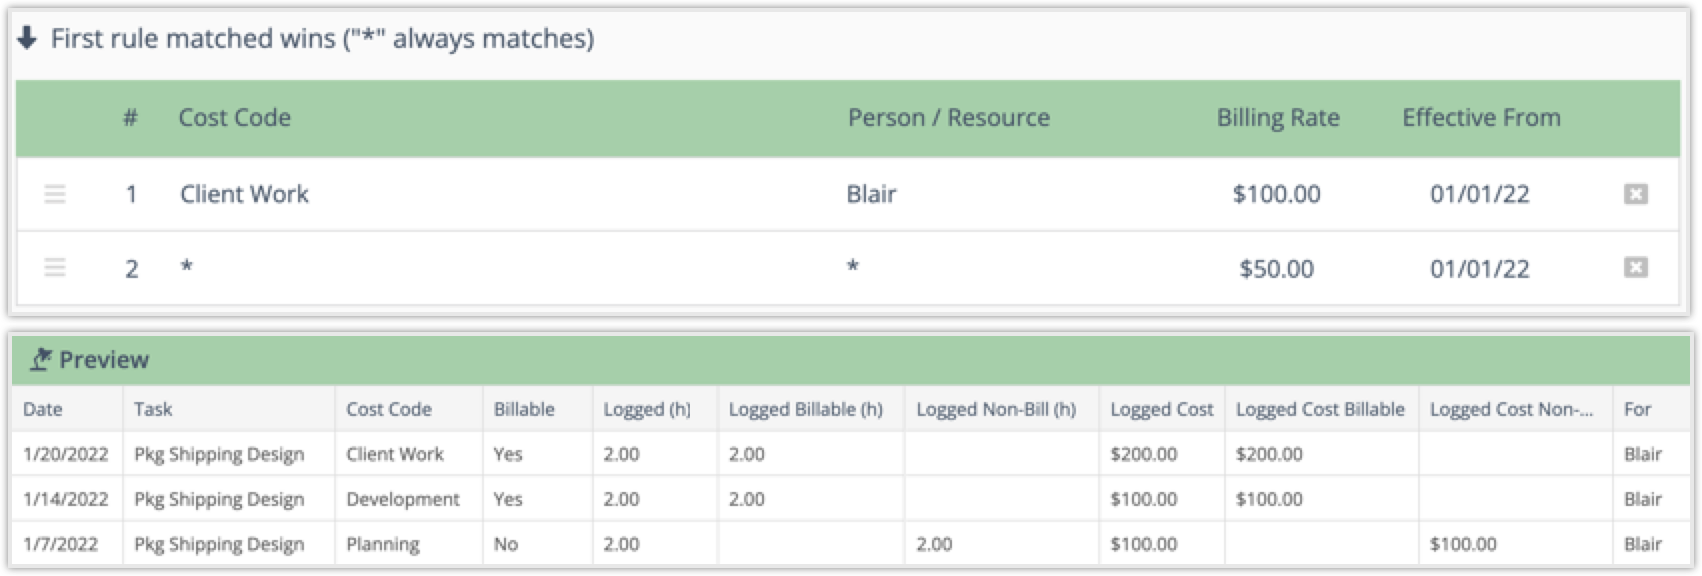
The images above show how rules are applied to columns in Timesheet Export. Column definitions are provided below.
Logged (h): Hours logged in the time period (could have billable cost code, non-billable cost code or no cost code applied).
Logged Billable (h): Hours logged to billable cost codes in the time period.
Logged Non-Billable (h): Hours logged in the time period to non-billable cost codes or had no cost code applied.
Logged Cost: Value of hours logged in the time period that meet billing rate sheet rule criteria. (Hours logged multiplied by Billing Rate).
Logged Cost Billable: Value of hours logged in the time period to billable cost codes that meet billing rate sheet rule criteria.
Logged Cost Non-Billable: Value of hours logged in the time period that meet billing rate sheet criteria for non-billable cost codes or having no cost code.
Logged Pay: Pay value for hours logged in the time period that meet pay rate sheet rule criteria. (Hours logged multiplied by Pay Rate).
Logged Pay Billable (h): Pay value for hours logged in the time period to billable cost codes that meet pay rate sheet rule criteria.
Logged Pay Non-Billable (h): Pay value for hours logged in the time period that meet pay rate sheet criteria for non-billable cost codes, or no cost code.


