Resources
Location: People in the left-side navigation
| 1 |
Represent people or machines outside your workspace # |
Resources are one of the options for assigning work and managing People in your workspace. They are used to schedule and track work for people outside your workspace, or to represent machine resources. Resources don’t sign in to your workspace. Their assignments are kept up to date by workspace members. With every User License purchased, two Resources are included for modeling.
Organization Administrators and Workspace Managers can create Resources and manage their profile.
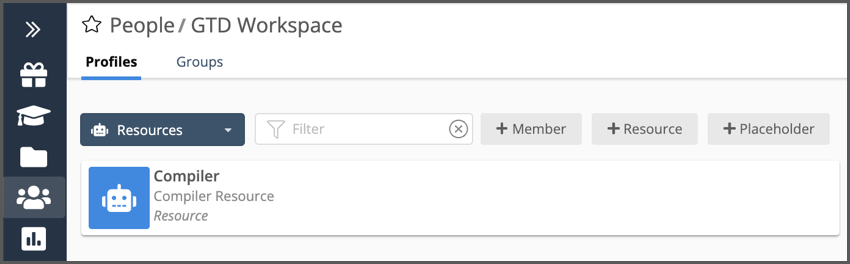
To add a new Resource, go to People in the left-side navigation and use +Resource.
Click on a Resource to view the Profile.
TIP: It’s a good idea to make sure another workspace member is taking care of the Resource by logging progress for them as well as keeping an eye on their estimates, Timesheet, and Availability. Click the star at the top of the Resource’s Workload View to favorite it for easy access.
| 2 |
Add Resources to your workspace # |
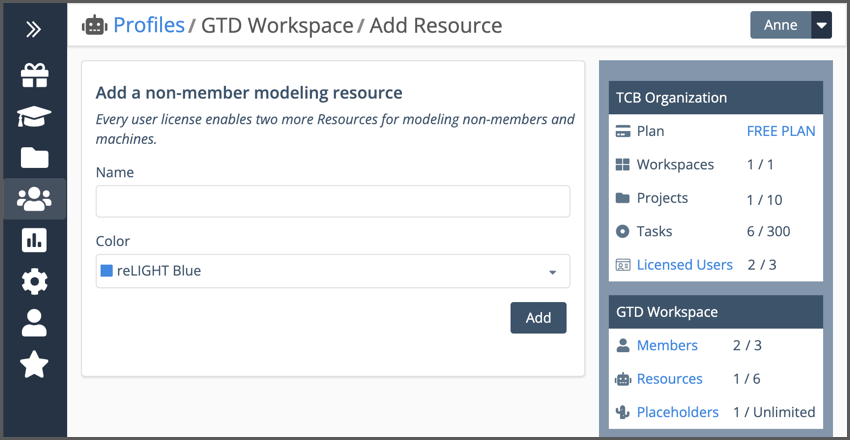
On the Add Resource page, enter the name and select a color. Metering on the right shows how many are available in your workspace. Org Admins can purchase User Licenses to increase your Resource count. Purchasing one User License gives you two Resources.
To purchase, use the Plan link at the top of Organization sidebar on the right and jump to the Manage Account page in Administration.
Workspaces on the FREE Plan have six Resources.
| 3 |
Set up the Resource Profile # |
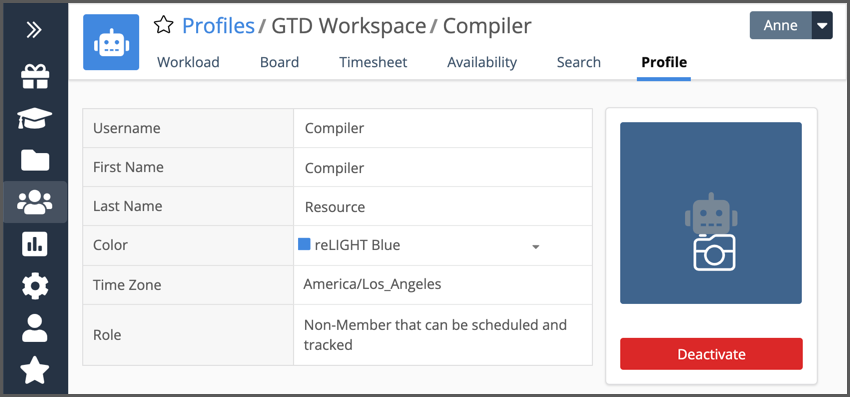
View a Resource Profile by going to People in the left-side navigation and selecting the Resource from the Profile list.
Username, first and last names, color and time zone are all editable. First and last names are optional fields. Hover over the Resource Avatar and click on the camera to upload a new avatar.
PROFESSIONAL and ULTIMATE workspaces can associate Resources with Custom Data. Workspaces on the ULTIMATE Plan can add Resources to Groups.
Deactivate & Reactivate
Org Admins and Workspace Managers can deactivate and reactivate Resources. Deactivating a Resource moves it to the Disconnected Profile list under People in the left-side navigation and it’s assignments stop scheduling. To avoid that it’s a good idea to re-assign work before deactivating.
Reactivate Resources on their Profile page. Go to People in the left-side navigation and use the drop down menu to filter the Profiles list by Disconnected. When a Resource is reactivated their tracking history syncs up and active assignments start scheduling again. You may be prompted to purchase a User License in order to reactivate a Resource.


