Single Sign-On | Premium Feature on the ULTIMATE Plan
Location: Administration in the left-side navigation
Supported Providers: OneLogin, Okta, Azure
| 1 |
LiquidPlanner supports SAML 2.0 # |
![]()
LiquidPlanner supports SAML 2.0 (Security Assertion Markup Language), which allows the use of SSO through enterprise identity providers such as Active Directory and LDAP. Single Sign-on is available for Organizations on the Ultimate Plan.
Org Admins configure SSO under Administration in the left side navigation. Enabling Single Sign-on via SAML 2.0 means that user authentication is handled entirely outside of LiquidPlanner.
The following providers are supported: OneLogin, Okta, Azure. Instructions for each provider are at the bottom of this lesson.
After SSO is enabled, users may log in from the SSO login page or the “Sign in with Single Sign-On” link on the LiquidPlanner sign-in page.
When new members are invited to LiquidPlanner they’ll be directed to your Organization’s SSO provider login page to enter their SSO credentials during the account activation process.
| 2 |
Prerequisites for SSO # |
In order to enable SSO, your LiquidPlanner Organization needs to be on the Ultimate Plan. SSO can also be tested during an Ultimate trial or Premium Features trial. Prior to enabling, work with your IT team to ensure the following:
Your SSO Identity Provider is SAML 2.0 based, set up and fully configured.
You know your ‘SAML 2.0 URL’. Also known as the Remote Login URL for your SAML server/service. Sometimes this is referred to as SAML Single Sign-on URL.
You know your Issuer URL.
You have the SSL certificate.
| 3 |
Configure SSO # |
![]()
Single Sign- on is found under Administration in the left-side navigation. Organization Administrators are the only people who can access the SSO set-up and management pages. The following providers are supported: OneLogin, Okta, Azure. Instructions for each provider are at the bottom of this lesson.
On the Setup SSO tab, fill out the attributes with information provided by your SSO Provider:
- Issuer URL
- Sign-on URL
- Logout Landing URL (Optional)
- SSO Identity Provider Certificate (Copy the entire text from the certificate and paste it here)
Each of the input fields have placeholder text to guide you. Hover over the question marks for additional help. Save to commit your changes after filling in the required fields.
The green check mark in the Step 1 header confirms that the information is saved in your LiquidPlanner Org.
Service Provider Details
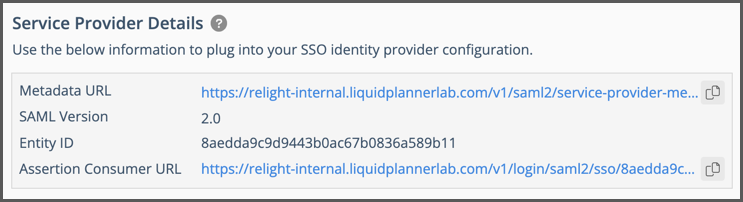
Use the information from the Service Provider Details table to configure LiquidPlanner as a service provider in your SSO Provider settings.
| 4 |
Test SSO Configuration # |
![]()
Configuring SSO or making any changes to the configuration needs to be tested before moving to the final step. Scroll down to Step 2 on the Setup SSO tab and use the Test Login button to test your SAML login.
Testing directs you to the SSO Provider login page on a new tab. Contact your SSO IT administrator if you don’t know the credentials.
If your test was successful, you’ll be returned to the SSO Setup page in LiquidPlanner. A green check mark in the Step 2 header confirms your success and the test button becomes disabled at this point. Now you’re ready for the final step: Enable and Manage SSO.
If testing was unsuccessful, go back to Step 1 and review the configuration fields.
| 5 |
Enable and Manage SSO # |
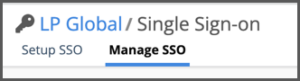
After configuration and testing use the Final Step button at the bottom of SSO Setup to activate the Manage SSO view. This is where an Org Admin can enable or disable SSO for their Organization, set SSO user requirements and defaults.
Enable SSO for your Organization
Select Yes to enable SSO for the organization.
Select No to disable SSO for the organization. All users will use their email and a password to login.
Selecting Yes enables the next two sections:
Require ALL Users to use SSO?
Selecting Yes requires all users to use SSO, while No allows for mixed authentication. With mixed authentication, users can be opted out of SSO manually by clicking on the Manage User Exception button.
Manage User Exceptions
In the Manage User Exceptions window, click on the red arrow button against a user’s name to move them to the SSO Enabled list. Click on the gray arrow button to move the user to the SSO Disabled list. The Manage User Exception modal is disabled if “Require ALL Users to use SSO is set to Yes”.
Save commits your selections and closes the window.
New User Default
This section controls what happens when new users are invited to a LiquidPlanner workspace. Organizations requiring everyone to use SSO will have the SSO option enabled by default. Those with mixed access can elect to have new users invited with or without the SSO requirement.
Choose “LP” if you prefer to have new users log in with their own email and password during the invitation process. The SSO requirement can be set manually after they have accepted their invitation. Click on Manage User Exceptions to access the member list.
Save
Save to commit your changes. Anyone who has been added to SSO Enabled list for the first time will be prompted to authenticate via SSO at their next action with LiquidPlanner.
Set up SSO with OneLogin # |

Log into your OneLogin account and go to the Applications tab. Click on the button to “Add App” and enter “SAML” into the search bar.
Select “SAML Custom Connector (Advanced) SAML 2.0”
Configuration
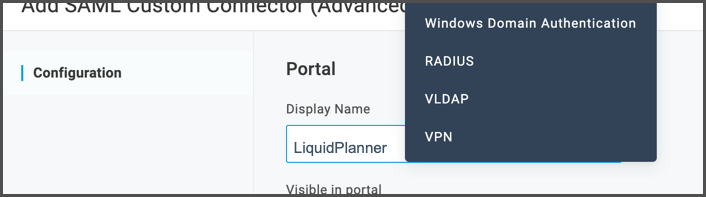
On this screen, enter Display name = LiquidPlanner, Visible portal = enabled and then Save.
Click on Configuration in the left-side navigation and enter the following attributes from the SSO Setup page in LiquidPlanner:
| Copy from LiquidPlanner | Paste into OneLogin |
| Metadata URL | Audience (EntityID) |
| Assertion Consumer URL | Recipient |
| Assertion Consumer URL | ACS (Consumer) URL |
| Assertion Consumer URL | Login URL |
In OneLogin, go to “SSO” and copy these attributes, then paste them into the LiquidPlanner SSO Setup page:
| Copy from OneLogin | Paste into LiquidPlanner |
| Issuer URL | Issuer URL |
| SAML 2.0. Endpoint (HTTP) | Sign-on URL |
| SLO Endpoint (HTTP) | Logout Landing URL (Optional) |
| X.509 Certificate | SSO Identity Provider Certificate |
Save settings in OneLogin and in LiquidPlanner.
Set up SSO with Okta # |
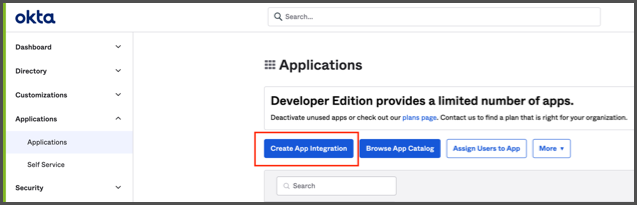
Log into your Okta account and select Applications in the left-side navigation. Use the Create App Integration button to get started.
Create a New App Integration
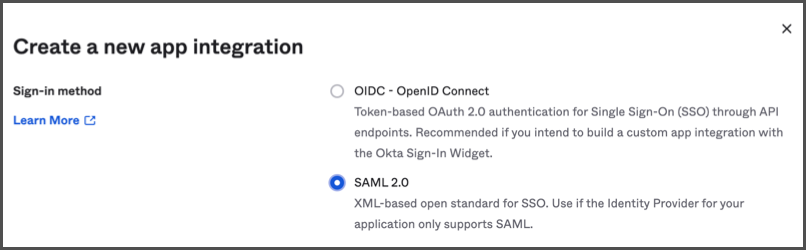
Select SAML 2.0 as the Sign-in method and click Next
Create SAML Integration in three steps
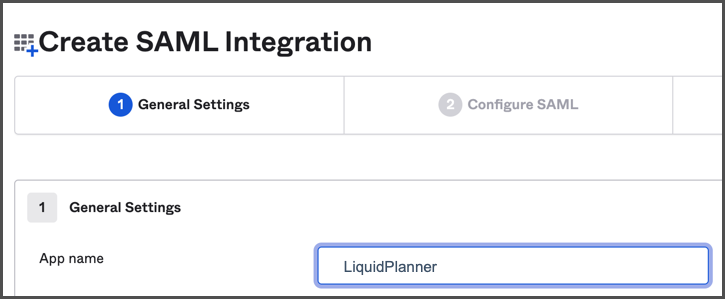
In step one under General Settings, enter LiquidPlanner as the app name.
Configure SAML
Go to the Configure SAML tab and enter the following attributes from the SSO Setup page in LiquidPlanner:
| Copy from LiquidPlanner | Paste into Okta |
| Assertion Consumer URL | Single Sign-On URL (check the box for “Use this for Recipient URL and Destination URLs) |
| Metadata URL | Audience URL (SP Entity ID) |
Additional Okta Settings
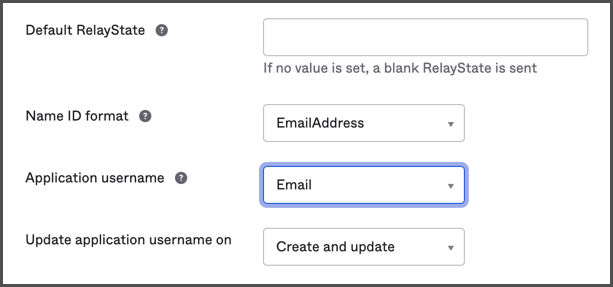
Default relaystate = <blank>
Name ID format = Email address
Application username = Email
Update application username on = create and update
After updating these fields click Next to open the Feedback tab.
Feedback

On the Feedback tab, select “I’m an Okta customer adding an internal app.” and leave everything else blank.
Click Finish and return to the General Settings tab. Select Go to Sign-On and then View Setup Instructions. Copy these attributes, then paste them into the LiquidPlanner SSO Setup page:
| Copy from Okta | Paste into LiquidPlanner |
| Identity Provider Single Sign-On URL | Sign-On URL |
| Identity Provider Issuer | Issuer URL |
| X.509 Certificate | SSO Identity Provider Certificate |
Save settings in Okta and LiquidPlanner. At this point Okta has additional settings under “Assignment” that need to be enabled which are not related to LiquidPlanner. Work with your IT team to follow through with remaining settings.
Set up SSO with Azure # |

Log into your Azure account to open the Azure Portal. Click on All Services to access the Azure Active Directory Default Directory Overview. Choose Enterprise Applications in the left-side navigation under Manage on the Overview page.

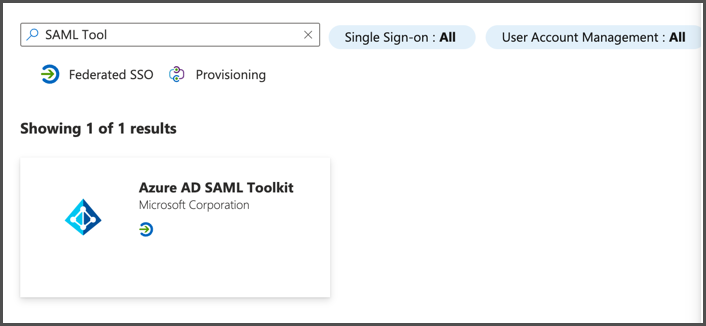
In the Azure AD Gallery select All Applications and New Application. Enter SAML Toolkit in the search box and select Azure AD SAML Toolkit from the results.
Azure AD SAML Toolkit
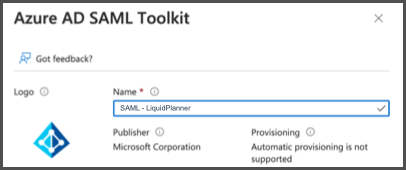
Enter a name into the tool kit to identify LiquidPlanner as an available app.
Click Create at the bottom of this page and wait a few moments while the app is added to your tenant.
Configure SSO for LiquidPlanner
Choose Single sign-on in the left-side navigation under Manage and begin the Basic SAML Configuration by entering the following attributes from the SSO Setup page in LiquidPlanner:
| Copy from LiquidPlanner | Paste into Azure |
| Metadata URL | Identifier (Entity ID) |
| Assertion Consumer URL | Reply URL (Assertion Consumer Service URL) |
| Assertion Consumer URL | Sign on URL |
Update Attributes & Claims
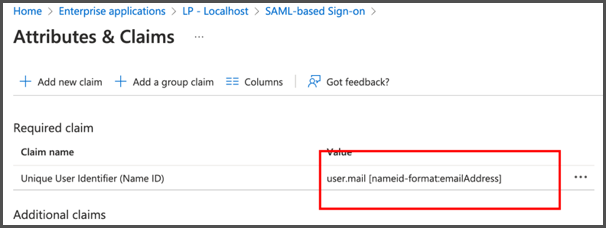
Under Required Claim, specify user email as the value. Enter values for Additional claims as needed.
Base64 Certificate File

Download the Base64 Certificate File.
Copy these attributes, then paste them into the LiquidPlanner SSO Setup page:
| Copy from Azure | Paste into LiquidPlanner |
| Login URL | Sign-on URL |
| Azure AD Identifier | Issuer URL |
| Logout URL | Logout Landing URL (Optional) |
| Contents of the Certificate (Base64) | SSO Identity Provider Certificate |
Save settings in Azure and LiquidPlanner.


