Tasks & Assignments
Location: Create Tasks in Project View. Navigate to Project View by clicking on the project while in Portfolio View.
Edit Panel: Click on a task name access the Task Edit Panel. Click on the task card in Board View.
| 1 |
Tasks for planning and scheduling # |
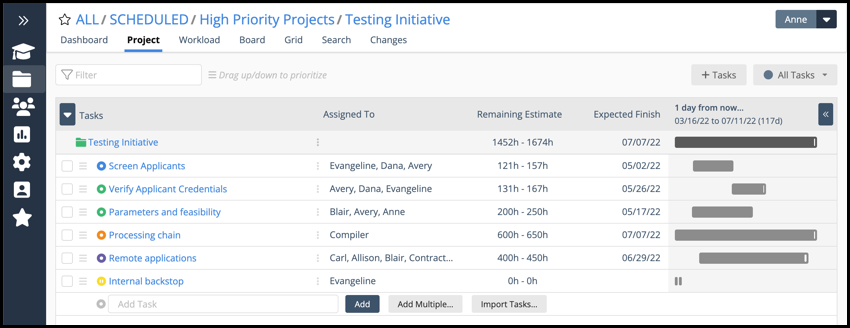
Add tasks to your Project by navigating to Project View. Clicking on the project name opens this view. Click into the Add Task field to activate the Add button.
There are several ways you can add Tasks to your Project:
Use the Add Task field to create a task, then assign and estimate the work.
Add up to 30 tasks at a time with Add Multiple or +Tasks.
Import up to 100 tasks. Learn how in the lesson, Import Tasks from Excel.
Insert and Duplicate Tasks using the right-click or 3-dot menu.
Tasks are essential for planning. Use them to break down all the work needed to complete a project and the scheduling engine will calculate start and finish dates as soon as everything is assigned and estimated.
Prioritize tasks by dragging them up or down the task list in Project View. If a task needs to schedule earlier than predicted, apply ASAP Task Scheduling and elevate it’s schedule priority to the highest position in the Project, Package, or for the Workspace. Prioritize Task Assignments by selecting Schedule in Order for Assignment Scheduling.
| 2 |
Assign, log progress and estimate on the Task Edit Panel # |
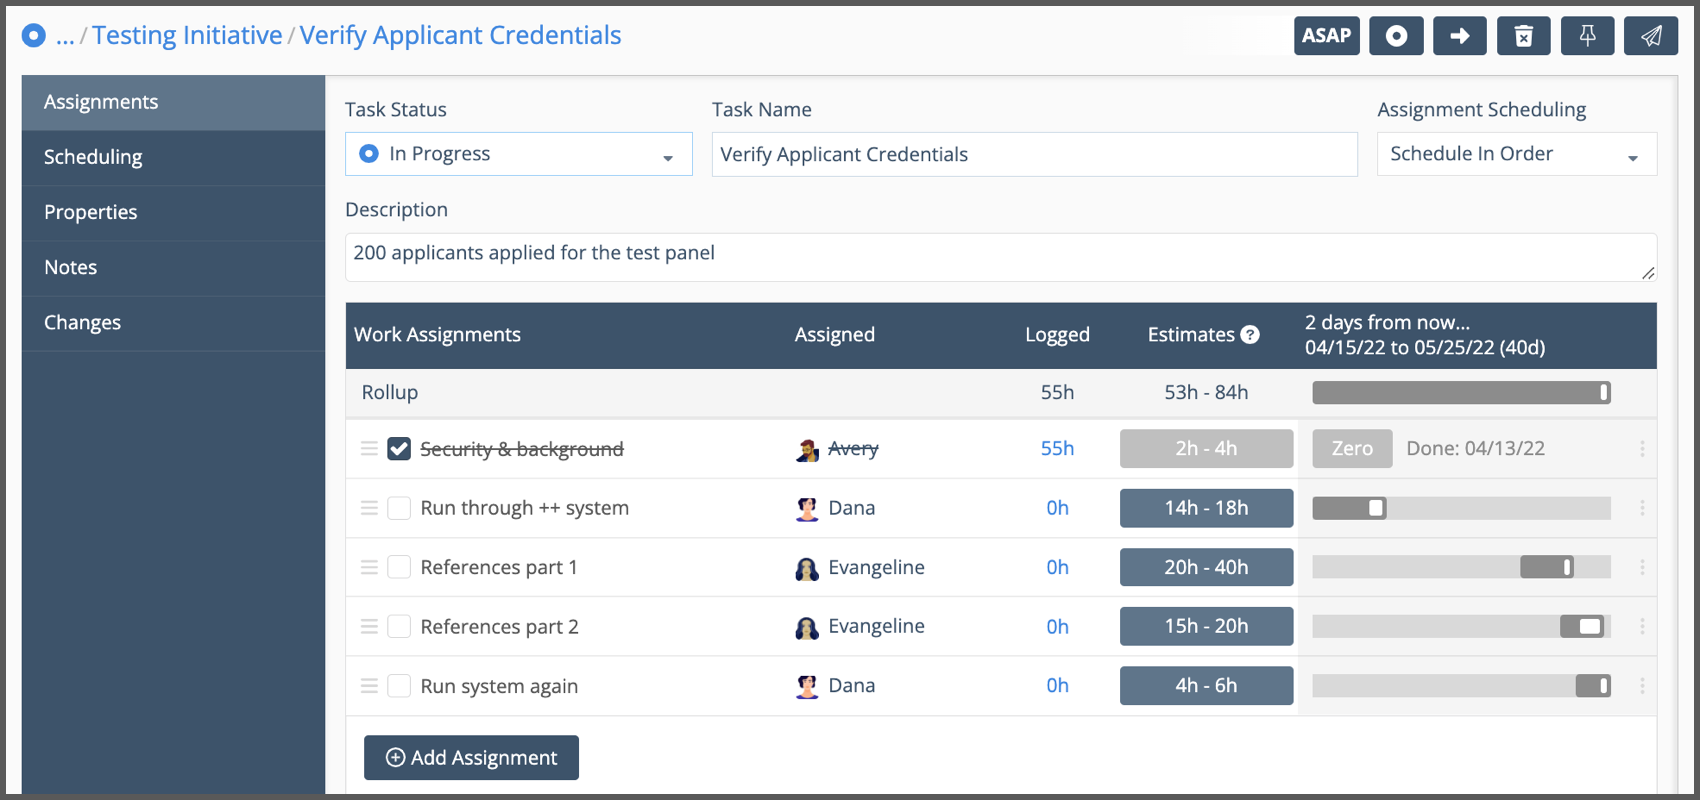
Assignments on the Task Edit Panel is the primary tab for assigning work and keeping the schedule up to date. Click on the task name in Project View to access the Task Edit Panel.
Task Status corresponds to scheduling behavior, Active, On Hold, or Done. Update the Task Status as you work through your assignments. Mark a Task Done by changing its status from Active or On Hold to Done. Marking the task done automatically marks any remaining assignments done.
There are two options for Assignment Scheduling.
Schedule In Order: assignments schedule in the order they are listed in the assignments table (priority order). In Order is the recommended default setting. The default can be changed in Workspace Settings, under Administration in the left-side navigation.
Schedule Independently: assignments schedule when people are available, regardless of their order on the Assignments Table. Schedule Independently can make it possible to finish a task earlier because people aren’t waiting for other task assignments to finish before they can start.
Description is a plaintext field. Information entered here can be displayed as a column in the Project and Grid views, and shown on Dashboards. Description is optional.
Assignments Table
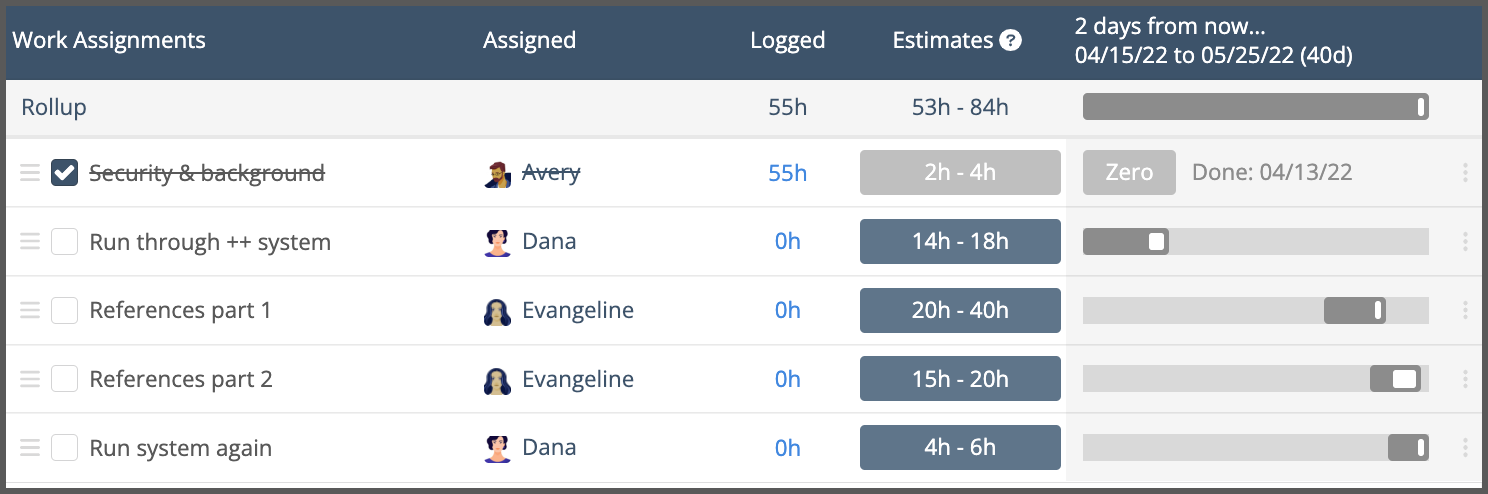
Enter work in the Assignments Table and assign it to members, resources or placeholders. Using multiple assignments can reduce the number of tasks in a project and eliminate the need for dependencies between tasks.
Use the drag bars to change assignment order. Use the 3-dot menu to delete an assignment, insert an assignment or jump to the member’s profile.
Mark an assignment Done by checking the box to the left of the assignment. When an assignment is marked done you can Zero out the remaining estimate and clear the field to 0-0.
Click into the Logged or Estimates fields to open the Hours Editor and log progress or update the remaining estimate. The Hours Editor is also where you add a Cost Code, view Logged and Total Work history or set the task to Tracking Only.
Learn about the Hours Editor in the Tracking & Estimating lesson.
| 3 | Task Scheduling, Targets & Insights |
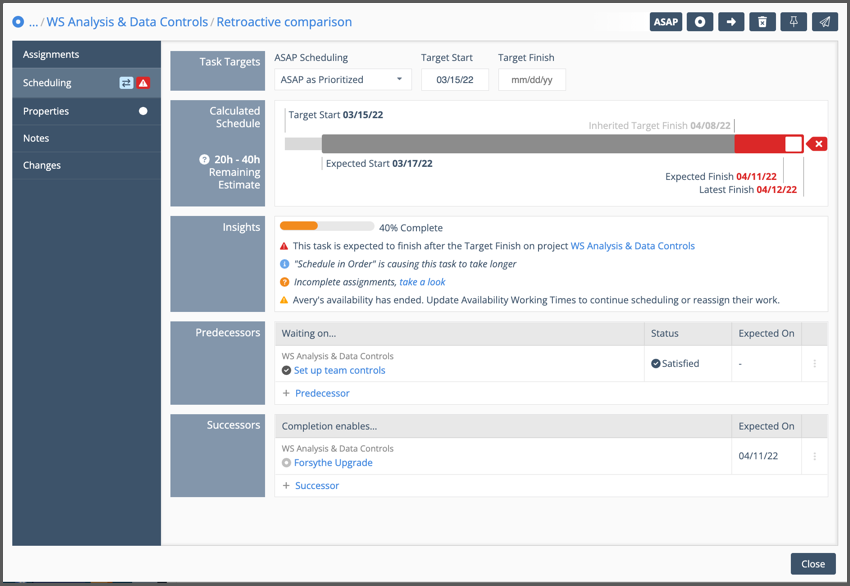
The Scheduling tab on the Task Edit Panel displays everything you need to know about how the task is progressing. When you’re viewing the task list in Project view you can jump to this tab by clicking on the task’s schedule bar.
Task Targets

Task Targets identify the ASAP Scheduling priority and Target Dates.
ASAP Scheduling elevates the schedule priority to highest in the Project, Package or Workspace.
Target Start ensures that work won’t start earlier than the selected date.
Target Finish is the deadline date in LiquidPlanner.
Calculated Schedule & Insights

Calculated Schedule displays the schedule bar and projected landing zone for work. The schedule bar turns red when the task will finish after a target date.
Expected Start is when you’re most likely to begin
Expected Finish is the date you’re working toward, this is the likely finish date
Latest Finish is how long it could take if worst case estimates come into play
Uncertainty is the white space between expected finish and latest finish. More white space means more uncertainty. If you’re concerned about how far apart these dates are, then it’s time to dig in and figure it out what needs to be done to close the gap between the best case and worst case estimates.
Insights call out progress, risk and workload information to help you make decisions and keep work moving forward.
Dependencies
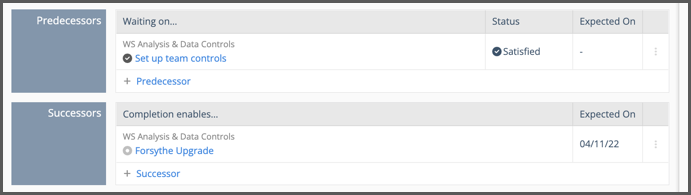
Predecessors and Successors show the Dependencies with other work.
| 4 |
Task properties, notes and changes # |

Use Edit Buttons at the top of the Task Edit Panel to set ASAP Scheduling, update Task Status, move, delete, pin it to your timesheet or copy a link to share with other workspace members.
Here’s a brief explanation of the other tabs on the Task Edit Panel.
Properties displays Custom Data, Work Metrics, Schedule Dates and Reference information. Custom Data fields are available in the PROFESSIONAL and ULTIMATE Plans. These fields can also be set as columns in Project view, included in Dashboard widgets, displayed as columns and exported from Grid View.
Notes is a rich text editor for information, instructions, images and links.
Changes records task updates and deleted assignments. Change history and deleted items are retained up to 90 days for paid accounts and 30 days on the FREE Plan.
| 5 |
Add Multiple Tasks # |
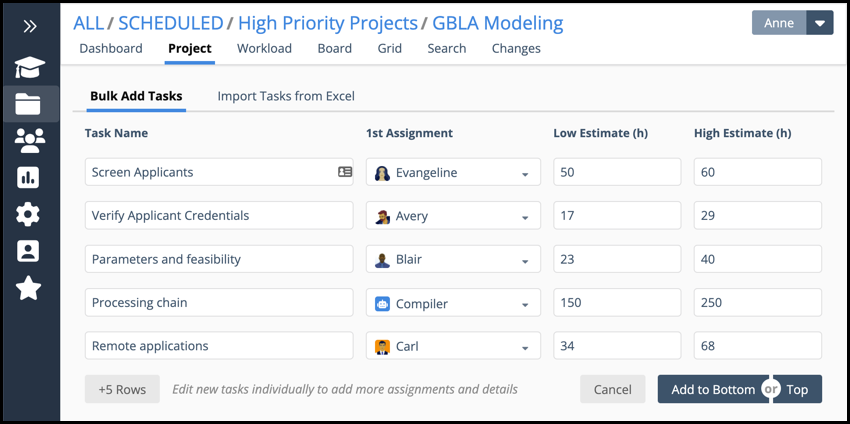
Use Add Multiple, or the +Tasks button at the top of Project View and add up to 30 Tasks at a time under Bulk Add Tasks. Enter the Task name, add the first assignment and estimate each task using a best case – worst case range.
Use the +5 Rows button to add five rows at a time, up to 30 rows total.
Add new tasks to the bottom or the top of the project task list. Prioritize Tasks after you add them by dragging them up or down the project list.
After the tasks are created you can add more assignments and edit task details on the Task Edit Panel.
| 6 |
Manage tasks with right-click and 3-dot menus # |
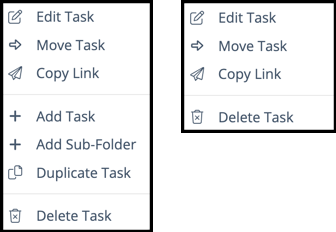
Use the right-click and 3-dot menus to manage tasks in any view. Edit Task opens the Edit Panel.
Portfolio View menu: Edit Task, Move Task, Copy Link, Add Task, Add Sub-Folder, Duplicate Task, Delete Task.
Workload and Grid menus: Edit Task, Move Task, Copy Link, Delete Task.


