 Say hello to the new Tempo! LiquidPlanner is now Portfolio Manager.
 Tracking & Estimating
Location: Hours Editor on the Task Edit Panel and the Timesheet.
| 1 |
Feed the Scheduling Engine # |
Tracking and Estimating feed the scheduling engine that calculates start and finish dates. Estimates transform into schedule bars representing remaining work. Tracking reduces the estimate and keeps the schedule up-to-date. Tracking and estimating lets everyone know you’re doing your part to keep things moving forward.
Tracking and Estimating are done in the Hours Editor which can be accessed from the Task Edit Panel and Timesheets.
Task Edit Panel Assignments tab: click into the Logged or Estimate fields.
Timesheet: click on the links for Assignment or Remaining hours.
| 2 |
Hours Editor: Estimate and Log Progress # |
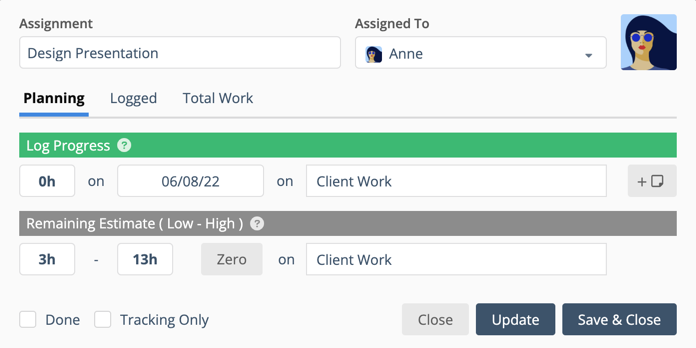
In the Hours Editor under Planning:
Edit the Assignment name
Assign the work to someone else. You’ll be prompted to add a new assignment if time has been tracked already.
Log Progress to show how much work has been completed. Logging Progress reduces the remaining estimate. Use today’s date, or click into the date field and open a calendar to select a different date.
Use a Cost Code if they are enabled in your Workspace.
Click on the +Note button and enter a timesheet note (optional).
Enter a Remaining Estimate to show how much is left to do. Re-estimate when you need more time to finish, or if you’ll wrap it up earlier than anticipated. Zero resets the estimate to 0 – 0.
Use check boxes to mark the Assignment Done or set it to Tracking Only.
| 3 |
Tracking Only Task Assignments # |
![]()
Check the box for Tracking Only when you need to track time to an assignment, but you don’t need Predictive Scheduling to calculate dates.
Pin Tracking Only Tasks to Workload & Timesheet
![]()
After closing the Hours Editor, use the pin at the top of the Edit Panel to keep this Tracking Only task front and center for easy access within your Workload, Timesheet, and Board views under My Work in the left-side navigation.
| 4 |
Estimate with a best case – worst case range # |
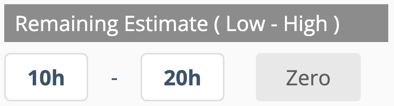
A best case – worst case estimate is your honest assessment of how much effort it’ll take to finish a task assignment. If things go well, work will be done in a shorter amount of time. If not, it’ll take longer. LiquidPlanner uses the range to statistically calculate your project schedule and capture the uncertainty in your work.
Here’s what you need to keep in mind while estimating:
The estimate is about your effort, not duration.
Use a wider range any time you’re unsure about the scope of work or when it’s something you haven’t tried before. If you’re having trouble, break a task down into multiple assignments and apply wider ranges to the parts that have more uncertainty.
Update estimates any time you have a better idea about what to expect. Add to the estimate when scope increases, reduce it if you’ll end earlier than schedule dates predict.
Zero resets the estimate to 0 – 0.
| 5 |
Time Tracking History # |
![]()
In the Hours Editor under Logged:
The table displays time tracking hours logged by day. Workspaces using Cost Codes will see hours logged by day, by Cost Code.
Click on the +Note button to enter a timesheet note or edit an existing note. The icon is orange when there’s a timesheet note in place already.
Use the Delete icon to delete a timesheet row entry. The remaining estimate will be restored and Predictive Scheduling will update the Expected Finish date.
| 6 |
Logged + Remaining = Total Work # |
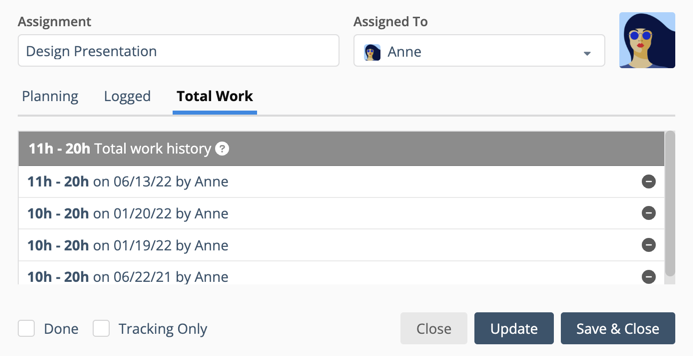
In the Hours Editor under Total Work the table displays the Hours Logged + Hours Remaining by person, per day.
| 7 |
Task Edit Panel # |
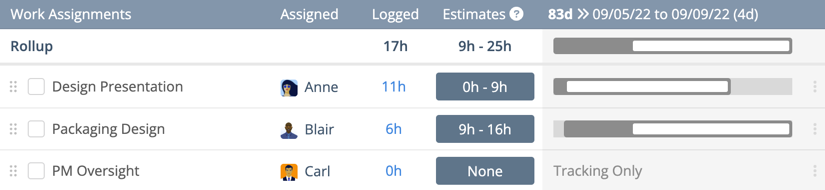
To log progress or update estimates on a Task you need to open the Edit Panel and go to the Assignment tab. Open the panel by clicking on the task name in any of the views. Click on the task card in Board View.
Access the Hours Editor by clicking into either the Logged or Estimates fields on the Assignments table. Using the Logged column places your cursor in the Log Progress field. The Estimates button places your cursor in the Low field for Remaining Estimate.
| 8 |
Timesheet # |
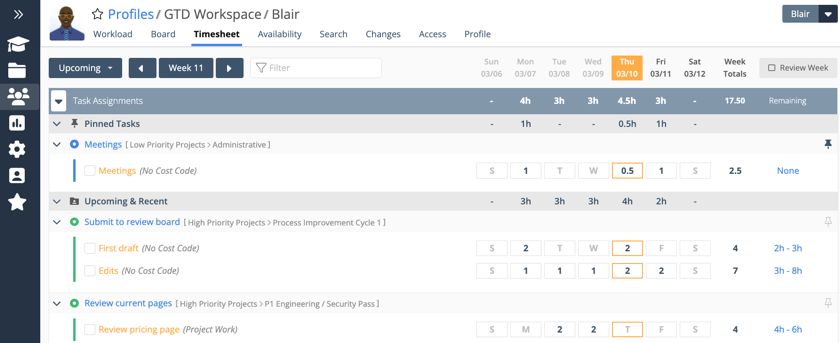
Timesheets display tasks by Assignment. To see Timesheets, go to People in the left navigation and choose a Person or Resource to view their Timesheet. To view your own Timesheet, use the person icon in the left-side navigation and go to My Work.
Log Progress by entering hours directly into the Timesheet. Delete a time entry when you need to make a change and the Remaining Estimate will be restored automatically.
Access the Hours Editor from the Timesheet by clicking on the Assignment name on the left or the Remaining field on the right.


